About Capacitive sensors
Bare Touch Sensors expanded
Circuit, sensor, capacitive sensing
What is a circuit
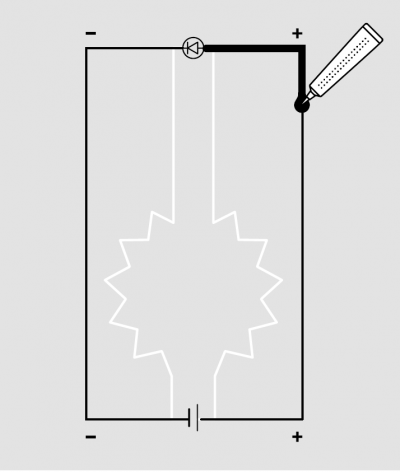
An electrical circuit is a pathway that begins and ends in the same place, passing electricity through it. In a basic circuit there will be components that put this electricity to use as power passes to each component or device. To be able to flow, electricity needs a conductive material as its pathway. Electric Paint is conductive, so it can provide this. How does it start moving in the first place? Electricity flows from a higher voltage (positive +) to a lower voltage (negative –). Batteries and some components will have a positive and negative connection (they exhibit polarity*) so it’s important to position them the right way round for electricity to flow through the circuit.
Your circuits don’t have to include straight lines or look conventional. With Electric Paint you can write a word or draw a picture to turn conductive pathways into graphics.
Sensors
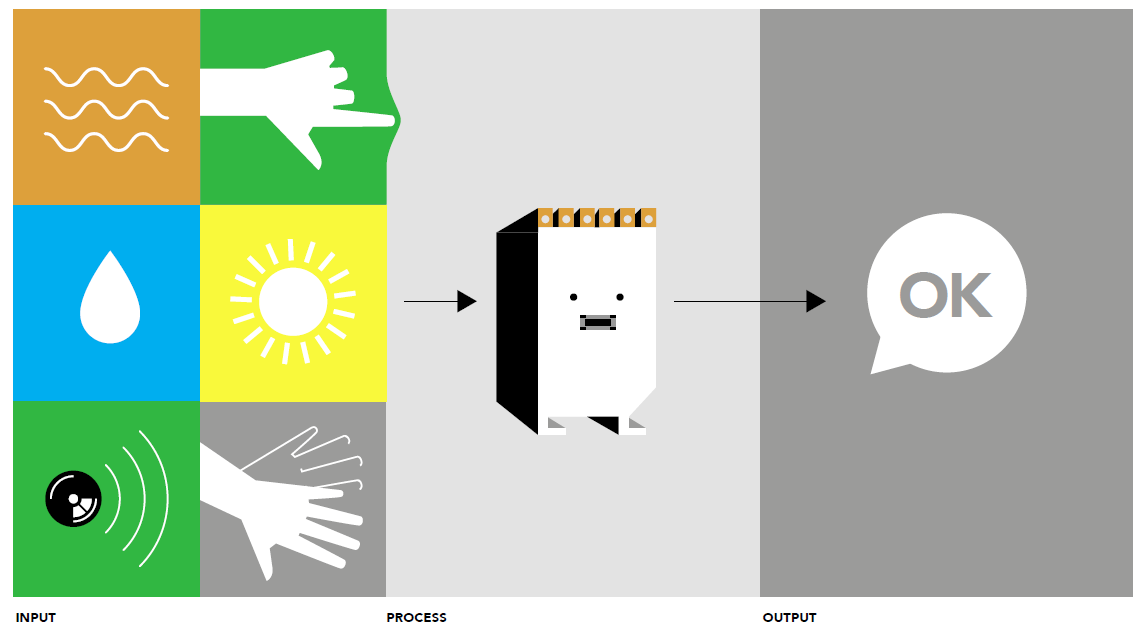
In the broadest definition, a sensor is an object whose purpose is to detect changes in its environment, which could be light, pressure, touch, heat, sound, moisture, and motion among other things. The sensor then provides an output that we can detect electronically. For example, a light sensor could detect the sun rising and trigger a system to open the blinds in a bedroom. The Touch Board has 12 sensors that can detect changes in capacitance caused by touch or proximity (distance). So it can translate touch or distance into any output defined by you.
How do capacitive sensors work?
In short
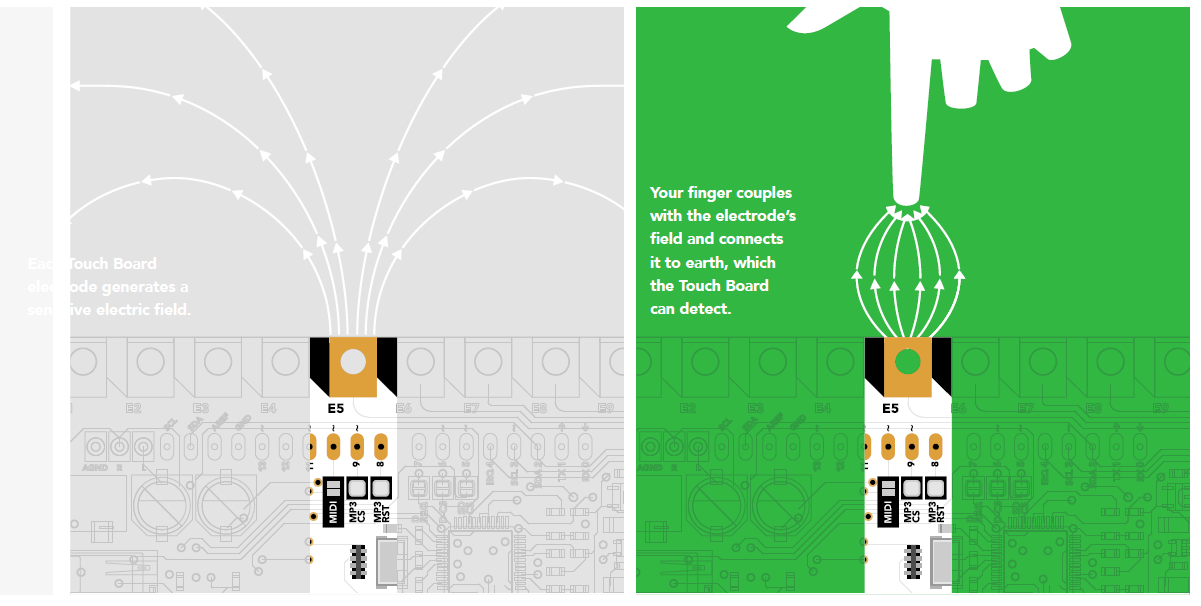
Capacitive sensing is a proximity sensing technology. It detects nearby objects by sensing that the electric field generated by a sensor (in this case one of the 12 electrodes), has been disrupted. It can detect anything that is conductive or that has a significantly different permittivity (Permittivity is the measure of the difficulty encountered when forming an electric field in a material. The ability of a substance to store electrical energy in an electric field) than that of air, like a human body or hand. Capacitive sensing is the technology used in smart-phone screens to detect touch. It’s also used in other situations where there’s a need to detect human touch or proximity. It’s also used when trying to detect something without touching it. The Touch Board has 12 capacitive sensing electrodes, each of which can individually detect touch and proximity.
A bit longer
First, let’s discuss what a capacitor is. In an electrical circuit, there are three fundamental components: resistors, capacitors and inductors. A resistor is a passive element that dissipates energy. Inductors and capacitors, however, are active elements, they store energy, and it’s capacitors that allow you to do capacitive sensing. Vice versa, you can do inductive sensing with inductors.
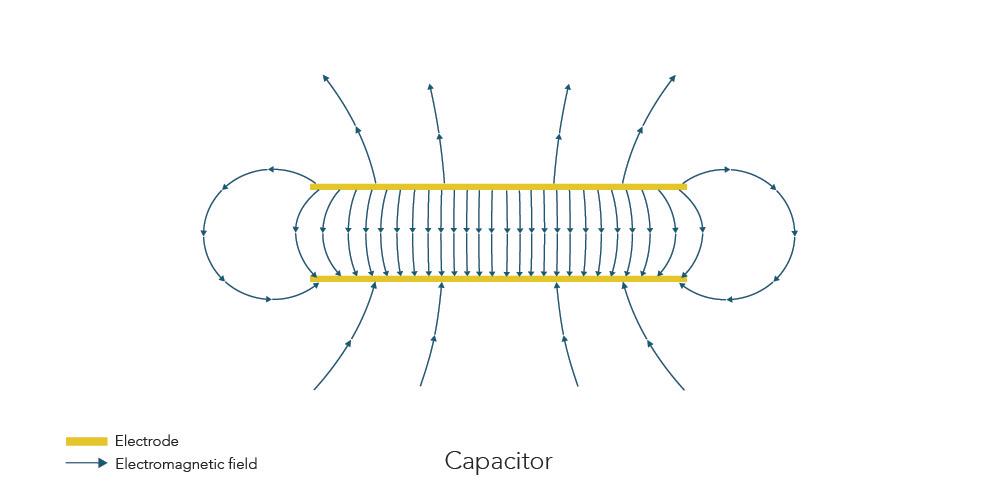
A capacitor in its simplest form compromises two conductive plates that are separated by a dielectric medium, which can be air, but in most cases is porcelain, glass or plastic. When a voltage is applied across the capacitor, they store a charge and an electric field forms across the dielectric. Capacitors can be used to smooth out the output voltage of a power supply or for filtering in signal processing. The amount of charge a capacitor can store is dependent on its capacitance and the capacitance of a capacitor is dependent on the area and distance of the plate and the dielectric constant. Capacitive sensing in turn is detecting the change in capacitance. An inductive sensor is similar to a capacitive sensor, but uses the inductance of a sensor to detect or measure objects.
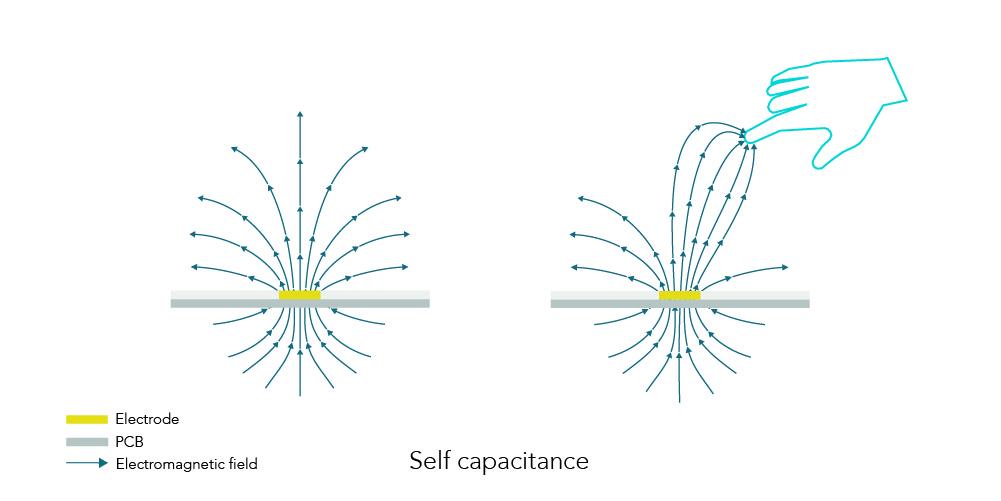
A touch capacitive sensor is therefore a sensor that uses the change in capacitance to sense touch or the presence of bulk material or fluids. Proximity capacitive sensors work like touch capacitive sensors, except they are more sensitive. There are two common ways to do capacitive sensing. One is self-capacitance and we use this sensing with our technology. On our boards, there are a number of electrodes that are used for capacitive sensing. You can think of them as one plate of a parallel-plate capacitor. The other plate is the surface of the earth – very large, but quite far away. When you bring part of your body close to one of these electrodes, that body part acts as the other plate of the capacitor. It takes over from the earth, as the body part is much closer and so has a bigger effect, and this increases the capacitance measured on that electrode. This is a proximity sensor and this change is registered by the board. If you bring your hand so close that you actually touch the electrode, the effect is even bigger than if you are just close to it. If you look at the output from that electrode on our Grapher, you will notice that the line goes down, not up – that is because the chip that measures capacitance on our boards has an output that is inversely proportional to capacitance – if the capacitance goes up, the output goes down. Each electrode of our boards acts as a capacitive touch sensor or as a capacitive proximity sensor. This method of capacitive sensing is called self-capacitance and each electrode is working independently. Here the capacitance is measured with respect to earth ground.
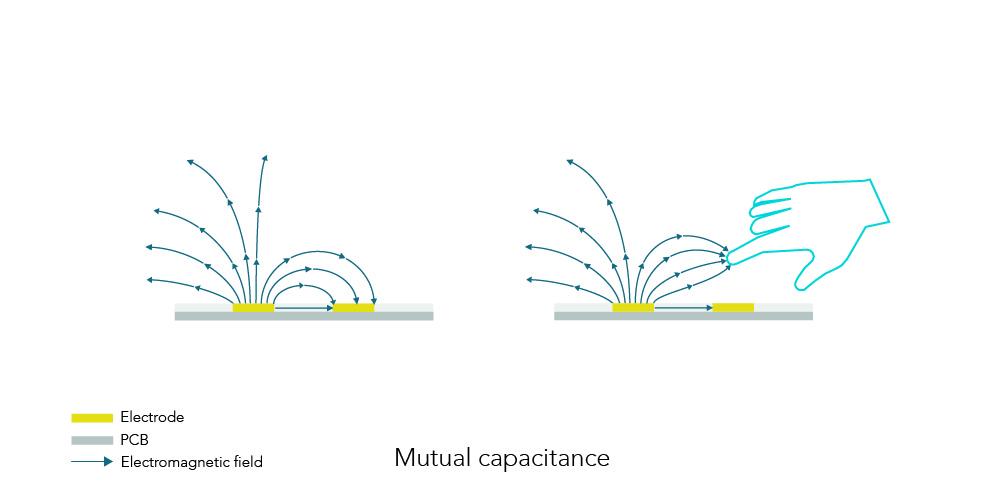
Another method is mutual capacitive sensing, which is the one used in touch screens of smartphones. With mutual capacitive sensing, there are two grids of capacitors overlaying each other. Instead of having two capacitive plates that don’t face each other, the plates lie next to each other. When a voltage is applied, you have a grid of capacitor plates that generate an electric field in-between them. When you approach them with your finger, it changes the characteristic of the field and that change is registered as a touch. This method of capacitive sensing allows you to detect more than just one capacitive touch and instead it can detect multiple touches.
Another important type of capacitive sensing is a capacitive displacement sensor. These are mostly used in manufacturing and are used for the measurement of distances and any displacement. In a capacitive displacement sensor, you have one part of the capacitor in a cylindrical shape, which forms the first plate of your capacitor. The other plate is formed by the area that is being measured. Since the area and the dielectric constant of the sensor remain constant, the distance can be measured by detecting changes in the capacitance allowing one to sense the position of the object.
With capacitive sensing, the user is able to detect and measure touch or proximity, the presence of a bulk material or fluid levels, and much more. You can use a capacitive sensor to create touch interfaces, like the touch screen on a smartphone, or as a proximity sensor, where you can create a switch, by hovering your hand over the sensor.
Soldering.....and why that is good for us
More of soldering two wires togetherrrr
Sensor design rules of thumb
The Guitarthing
aka a wicked bareboard ukulele
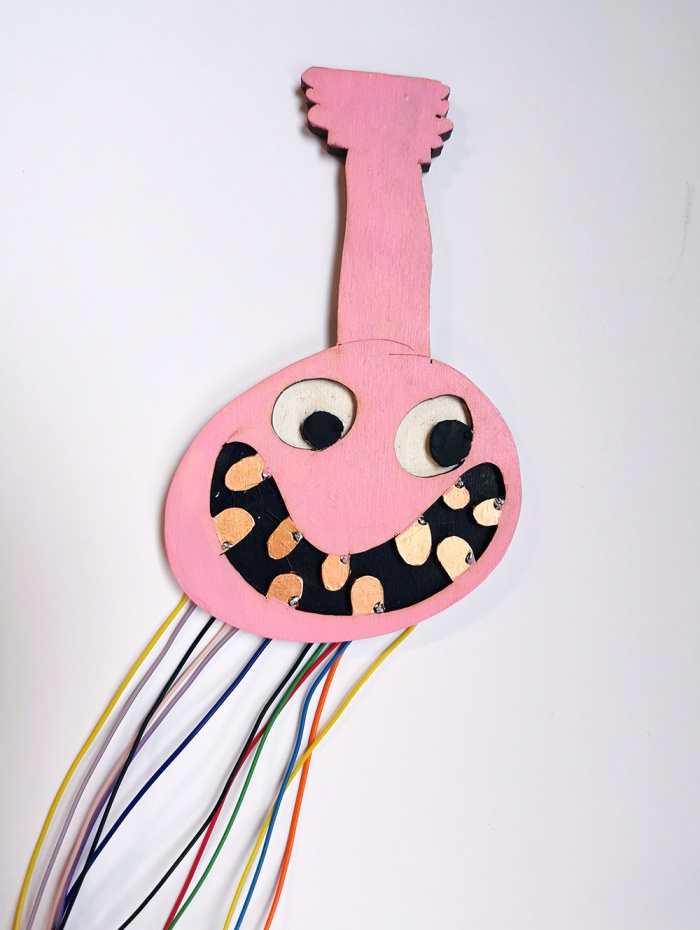
Each of us will build a very simple touch interface. A guitarlike thing. Each of you will load their own samples and end of next week we will perform a short concert with the guitars.
Here is mine
Since we have 5 soldering workstations, we will work in groups performing different steps.
Everyone at once
1. Use the copper tape to tape each tooth of the Guitarthing and make it shiny.
2. Make it neat, cut out excess material with the stanley knife.
3. Then you take the hard small piece of wire and poke open the holes that we just covered with the copper tape ( That is becase we will push the wires through and solder them onto the copper, but that is later)
Group Soldering
5 people can start soldering at the same time. I will assist that group and be checking in on the rest
You have to solder wires that connect to the teeth of the Guitarthing. Those wires then go through the holes of the back wood plate and the other end of the wires connext to a 12 pin header that we will be able to plug into the Bare board!
So lot's of work here, we will be finishing that next time as well, that is why we have 2 classes:)
1. Cut 12 wires with a minimum length of 40 cm.
2. Start by stripping one end of the wire. Expose about 1 cm of the wire.
3. Twist it so all the wire strands come together nicely.
4. Put a small amount of solder onto it, so it becomes firm and does not separate.
5. Push it through the back of the Guitarthing towards the copper covered teeth.
6. Solder the wire to the copper tooth.
7. Cut out the excess wire from the copper side of the tooth ( not hte actual unexposed, unstripped wire). We do this so the tooth is as smooth as possible for us touching it later.
8. Soler the other side of the wire onto the pin header.
9. Repeat this another 11 times
Group Prepare the Interface
1. Check again the teeth of the interface, is it neat and nice, clean it up if you see necessary.
2. Paint the Guitathing. One piece is the front of the interface, where you can decide the color(s) of the guitar and the other is the back, where you can paint the inside of the eyes and mouth. Go crazy.
3. You can also drill the guitar to attach a guitar strap. Also make a guitar strap to hang it onto your body.
