Difference between revisions of "Set up VR in Unity"
| Line 11: | Line 11: | ||
tick the Oclus box (if using oculus) open xr if using others | tick the Oclus box (if using oculus) open xr if using others | ||
<br/> | <br/> | ||
| − | [[File:03_open_xr_plugin.png|400px]]<br/><br/> | + | [[File:03_open_xr_plugin.png|400px]]<br/> |
| + | Choose your PlayMode Open XR Runtime <br/> | ||
| + | [[File:04_open_xr_playmode.png|400px]]<br/> | ||
| + | 3.Enable preview Packages in the Package Manager:<br/> | ||
| + | Window / Package Manager<br/> | ||
| + | in the package manager click on the gear and choose "advanced project settings"<br/> | ||
| + | under "Advanced Settings" tick on "Enable Preview Packages"<br/> | ||
| + | [[File:04 | ||
| + | <br/> | ||
| + | |||
| − | |||
| − | |||
| − | |||
| − | |||
| − | |||
4.In the package Manager install "XR Interaction Toolkit *.*.*-pre*" (whatever the latest version is) | 4.In the package Manager install "XR Interaction Toolkit *.*.*-pre*" (whatever the latest version is) | ||
at the top left of the package manager select Packages: Unity Registry | at the top left of the package manager select Packages: Unity Registry | ||
Revision as of 14:24, 19 January 2022
Setting up VR and XR interaction toolkit project in Unity for versions 2019.4,2020.x & 2021.1
1. Install XR plugin management:
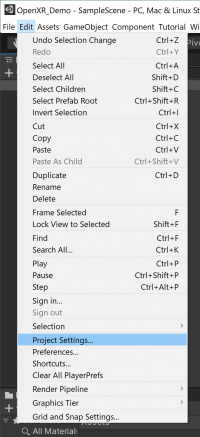
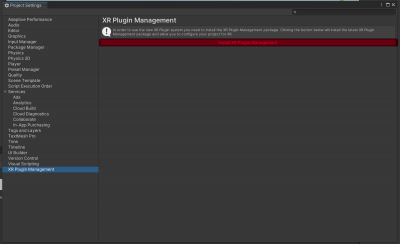
edit / project settings / xr plugin management / install xr pluging management


2. Add Oculus to the plugin providers:
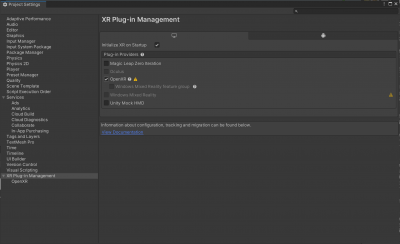
tick the Oclus box (if using oculus) open xr if using others

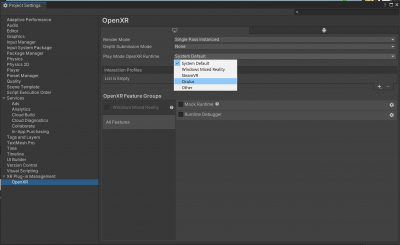
Choose your PlayMode Open XR Runtime

3.Enable preview Packages in the Package Manager:
Window / Package Manager
in the package manager click on the gear and choose "advanced project settings"
under "Advanced Settings" tick on "Enable Preview Packages"
[[File:04
4.In the package Manager install "XR Interaction Toolkit *.*.*-pre*" (whatever the latest version is)
at the top left of the package manager select Packages: Unity Registry
expand XR Interaction Toolkit and click see other versions
click install in the lower right corner of the package manager
4B. In the XR interaction Toolkit package / samples
Download and import the Default Input Actions
5. In the Project tab under assets
Assets / Samples / XR interaction toolkit / 1.... / Default Input Actions /
select "XRI Default Left Controller" - In the inspector click "Add to ActionBasedController default"
same for right
6. edit / project / settings / preset manager /
under Action Based Controller in the filter add
"left" to the filter for "XRI Default left Controller"
"right" to the filter for "XRI Default right Controller"
7.now you can add an XR Rig - Action Based to your project
Game Object / XR / XR Rig Action Based
8.On the XR rig Game Object in the inspector
add a component called
"Input Action Manager"
in the component under "Action Assets" change the number to 1 and expand
click on the dot to select "XRI default input actions"
9. You may have to enable the following setting: "Window/Analysis/Input Debugger/Options/Lock Input to Game View"