Difference between revisions of "Setting up the Monitor Speakers"
Jump to navigation
Jump to search
| (9 intermediate revisions by 2 users not shown) | |||
| Line 1: | Line 1: | ||
| − | This article describes how to set up the KRK Monitor Speakers on the Interaciton Station in a stereo (2-speaker) setup. You can use it for connecting a laptop or a microphone. How to set up the speakers in a quadrophonic setup (4-speakers) might be explained in the future, you can contact [[User:Thomas | Thomas]] for now. | + | This article describes how to set up the KRK Monitor Speakers on the Interaciton Station in a stereo (2-speaker) setup. You can use it for connecting a laptop and/or a microphone. How to set up the speakers in a quadrophonic setup (4-speakers) might be explained in the future, you can contact [[User:Thomas | Thomas]] for now. |
| − | == Setting up the monitor | + | == Setting up the monitor speakers in a stereo setup == |
<gallery> | <gallery> | ||
| − | File:Krk_rokit_monitor_speakers.jpg|KRK | + | File:Krk_rokit_monitor_speakers.jpg|KRK monitor speakers |
File:Behringer_xenyx_502_mixer.png|Behringer Xenyx 502 mixer | File:Behringer_xenyx_502_mixer.png|Behringer Xenyx 502 mixer | ||
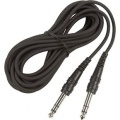
File:Trs_cable.jpg|TRS ("Jack") cable | File:Trs_cable.jpg|TRS ("Jack") cable | ||
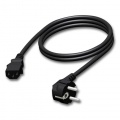
File:Euro_power_cable.jpg|EURO power cable | File:Euro_power_cable.jpg|EURO power cable | ||
File:Minijack_to_chinch.png|Minijack to chinch cable ''(for connecting a laptop)'' | File:Minijack_to_chinch.png|Minijack to chinch cable ''(for connecting a laptop)'' | ||
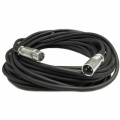
| − | File:Xlr_cable.jpg|XLR cable ''(for connecting a mic)'' | + | File:Xlr_cable.jpg|XLR cable <br>''(for connecting a mic)'' |
</gallery> | </gallery> | ||
| Line 16: | Line 16: | ||
#Connect the Mixer to the power source with the accompanying power supply. | #Connect the Mixer to the power source with the accompanying power supply. | ||
#Connect 2 TRS Cables to the left and right ''MAIN OUT'' output on the mixer. Connect the other sides to the TRS input on the monitor speakers. | #Connect 2 TRS Cables to the left and right ''MAIN OUT'' output on the mixer. Connect the other sides to the TRS input on the monitor speakers. | ||
| − | #For connecting a laptop, connect it to the 2- | + | #For connecting a laptop, connect it to the mixer's ''2-TRACK INPUT'' with the minijack-to-chinch cable. And / or connect a microphone using an XLR cable. (when connecting a microphone, set the two leftmost white knobs on the mixer to the middle position) |
| − | #Make sure the ''MAIN MIX'' volume knob (bottom right) is turned all the way down. Only then power on the monitors. | + | #Make sure the ''MAIN MIX'' volume knob (bottom right) is turned all the way down. Only then power on the monitors. Finally, slowly raise the ''MAIN MIX'' volume to test if the sound is working. |
| + | |||
| + | [[Category:Sound]][Category:Machines and facilities]] | ||
Latest revision as of 11:36, 22 November 2022
This article describes how to set up the KRK Monitor Speakers on the Interaciton Station in a stereo (2-speaker) setup. You can use it for connecting a laptop and/or a microphone. How to set up the speakers in a quadrophonic setup (4-speakers) might be explained in the future, you can contact Thomas for now.
Setting up the monitor speakers in a stereo setup
- First, make sure the monitor speakers are switched off on the back side! Connect them to the power with the Euro cables. Leave them off for now. Make sure the VOLUME knob on the back of both speakers is set the same (typically 0 dB)
- Connect the Mixer to the power source with the accompanying power supply.
- Connect 2 TRS Cables to the left and right MAIN OUT output on the mixer. Connect the other sides to the TRS input on the monitor speakers.
- For connecting a laptop, connect it to the mixer's 2-TRACK INPUT with the minijack-to-chinch cable. And / or connect a microphone using an XLR cable. (when connecting a microphone, set the two leftmost white knobs on the mixer to the middle position)
- Make sure the MAIN MIX volume knob (bottom right) is turned all the way down. Only then power on the monitors. Finally, slowly raise the MAIN MIX volume to test if the sound is working.[Category:Machines and facilities]]


