Difference between revisions of "VQGAN+CLIP"
m (→Image Prompts) |
|||
| (11 intermediate revisions by 3 users not shown) | |||
| Line 1: | Line 1: | ||
| + | == NOTE == | ||
| + | While VQGAN+CLIP has its own aesthetic, a newer, "better" algorithm named stable diffusion has been released to generate images from a sentence. You can find a tutorial for stable diffusion [[Stable Diffusion | on this page]] | ||
| + | |||
== Generate Images from a text prompt == | == Generate Images from a text prompt == | ||
| Line 18: | Line 21: | ||
Click the "Show appplications" icon in the bottom left of the screen and type "terminal" in the search box. Select the terminal icon that pops up. This will open a black window that will allow you to type commands. | Click the "Show appplications" icon in the bottom left of the screen and type "terminal" in the search box. Select the terminal icon that pops up. This will open a black window that will allow you to type commands. | ||
type the following: | type the following: | ||
| − | cd | + | cd MachineLearning/VQGAN_CLIP-Docker |
and then | and then | ||
| Line 26: | Line 29: | ||
== Step 3: Modify the configuration file == | == Step 3: Modify the configuration file == | ||
| − | Click on the "Files" icon in the top left of the Ubuntu screen and navigate to | + | Click on the "Files" icon in the top left of the Ubuntu screen and navigate to MachineLearning - VQGAN_CLIP-Docker - configs. |
Now open the file called "local.json" | Now open the file called "local.json" | ||
Some of the things you can change here are a bit mysterious but let's have a look at some that are interesting to us for sure | Some of the things you can change here are a bit mysterious but let's have a look at some that are interesting to us for sure | ||
| Line 33: | Line 36: | ||
Here you can type what image to generate.<br> | Here you can type what image to generate.<br> | ||
For example:<br> | For example:<br> | ||
| − | “prompts”: [“Wild roses near a river”],<br> | + | “prompts”: [“Wild roses near a river”],<br><br> |
| + | [[File:1 wild roses near the river.png]]<br><br> | ||
You can enter multiple text prompts like this:<br> | You can enter multiple text prompts like this:<br> | ||
| − | “prompts”: [“Wild roses near a river”, “Giger”],<br> | + | “prompts”: [“Wild roses near a river”, “Giger”],<br><br> |
| + | [[File:2 wild roses near the river giger.png]]<br><br> | ||
It is also possible to give weights to each text. All weights should add up to 100. e.g.:<br> | It is also possible to give weights to each text. All weights should add up to 100. e.g.:<br> | ||
| − | “prompts”: [“Wild roses near a river:80”, “Giger:20”],<br> | + | “prompts”: [“Wild roses near a river:80”, “Giger:20”],<br><br> |
| − | This will result in less Giger, and more Wild roses near a river<br> | + | [[File:3 wild roses near the river-80 giger-20.png]]<br><br> |
| + | This will result in less Giger, and more Wild roses near a river<br><br> | ||
Choosing keywords wisely for your prompts can make a huge difference! <br> | Choosing keywords wisely for your prompts can make a huge difference! <br> | ||
You can see this clearly from the grid posted here https://imgur.com/a/SnSIQRu | You can see this clearly from the grid posted here https://imgur.com/a/SnSIQRu | ||
| Line 44: | Line 50: | ||
=== Image Prompts === | === Image Prompts === | ||
You can also give the algorithm one or more image prompts. The computer will try to make images that are similar to the image prompts specified.<br> | You can also give the algorithm one or more image prompts. The computer will try to make images that are similar to the image prompts specified.<br> | ||
| − | “image_prompts”:[“./ | + | “image_prompts”:[“./hanhoogerbrugge.jpg”],<br> |
| − | Copy the images that you use in the VQGAN-CLIP-Docker folder | + | Copy the images that you use in the VQGAN-CLIP-Docker folder<br><br> |
| + | |||
| + | [[File:A drawing in the style of Giger imgprompt 250 it.png]]<br><br> | ||
| + | This was generated after 250 iterations using prompt: "A drawing in the style of Giger" and the following image prompt: <br><br> | ||
| + | [[File:Hanhoogerbrugge.jpg]] | ||
=== Max Iterations === | === Max Iterations === | ||
| − | Here you specify how many steps to take. More iterations will lead to more detail, and will take longer to process. 250 is usually a nice number to see if it is going in a direction you like. The more iterations the more detail, but this will also take longer to process. | + | Here you specify how many steps to take. More iterations will lead to more detail, and will take longer to process. 250 is usually a nice number to see if it is going in a direction you like. The more iterations the more detail, but this will also take longer to process.<br> |
A low number can be nice if you also specify an init_image, and will function like style transfer. | A low number can be nice if you also specify an init_image, and will function like style transfer. | ||
| − | “max_iterations”: 250, | + | “max_iterations”: 250,<br><br> |
=== Save frequency === | === Save frequency === | ||
| Line 63: | Line 73: | ||
=== Init Image === | === Init Image === | ||
| − | You can specify an image to start from. This will give you some control of where things will be placed. | + | You can specify an image to start from. This will give you some control of where things will be placed.<br> |
| − | “init_image”: “./ | + | “init_image”: “./hanhoogerbrugge.jpg”,<br> |
| − | Copy the images that you use in the VQGAN-CLIP-Docker folder | + | Copy the images that you use in the VQGAN-CLIP-Docker folder<br> |
| + | Init image with few "max_iterations" will result in sort of a style transfer<br><br> | ||
| + | |||
| + | [[File:A drawing in the style of Giger init img 80 it.png]]<br><br> | ||
| + | This was generated after 80 iteration with prompt "A drawing in the style of Giger", and the image below as init_image <br><br> | ||
| + | [[File:Hanhoogerbrugge.jpg]] | ||
== Step 4: Save the configuration and start generating == | == Step 4: Save the configuration and start generating == | ||
| Line 85: | Line 100: | ||
== Original Config file == | == Original Config file == | ||
You can find the original config file at https://github.com/kcosta42/VQGAN-CLIP-Docker/blob/main/configs/local.json | You can find the original config file at https://github.com/kcosta42/VQGAN-CLIP-Docker/blob/main/configs/local.json | ||
| + | |||
| + | [[Category:Generative Models]] | ||
Latest revision as of 15:42, 22 November 2022
NOTE
While VQGAN+CLIP has its own aesthetic, a newer, "better" algorithm named stable diffusion has been released to generate images from a sentence. You can find a tutorial for stable diffusion on this page
Generate Images from a text prompt
In this tutorial we will create images by typing text.
If you want to do this from your home you can use this colab: https://github.com/justin-bennington/somewhere-ml/blob/main/S2_GAN_Art_Generator_(VQGAN%2C_CLIP%2C_Guided_Diffusion).ipynb How to use it is described here: https://docs.google.com/document/d/1Lu7XPRKlNhBQjcKr8k8qRzUzbBW7kzxb5Vu72GMRn2E/edit
However, it is much faster to work on the computers at the Interaction Station, where we installed everything you need on the pc's in WH.02.110.
Step 1: Boot the PC to Ubuntu
We need to start the computer in the Linux Ubuntu Operating System, so when you start the computer keep an eye on the screen. When it lists some options, select "Ubuntu". If the computer starts Windows, you missed it. Just restart the computer and try again. When it starts Ubuntu and asks you for a login, select user "InteractionStation", and type the password "toegangstud"
Step 2: Start the conda environment in a terminal
Click the "Show appplications" icon in the bottom left of the screen and type "terminal" in the search box. Select the terminal icon that pops up. This will open a black window that will allow you to type commands. type the following:
cd MachineLearning/VQGAN_CLIP-Docker
and then
conda activate vqgan-clip
You are now ready to run things but first we must modify the configuration file to your wishes.
Step 3: Modify the configuration file
Click on the "Files" icon in the top left of the Ubuntu screen and navigate to MachineLearning - VQGAN_CLIP-Docker - configs. Now open the file called "local.json" Some of the things you can change here are a bit mysterious but let's have a look at some that are interesting to us for sure
prompts
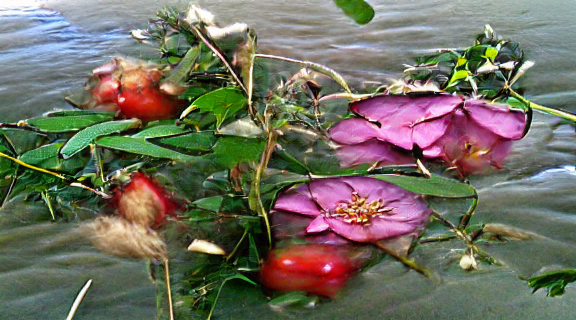
Here you can type what image to generate.
For example:
“prompts”: [“Wild roses near a river”],
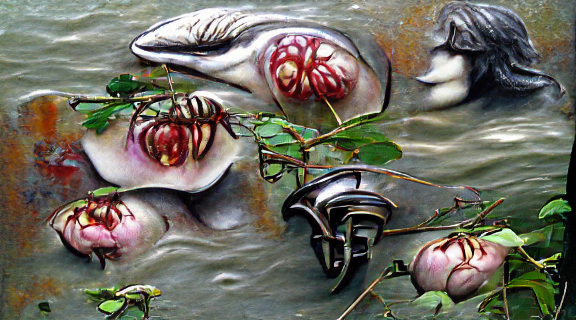
You can enter multiple text prompts like this:
“prompts”: [“Wild roses near a river”, “Giger”],
It is also possible to give weights to each text. All weights should add up to 100. e.g.:
“prompts”: [“Wild roses near a river:80”, “Giger:20”],
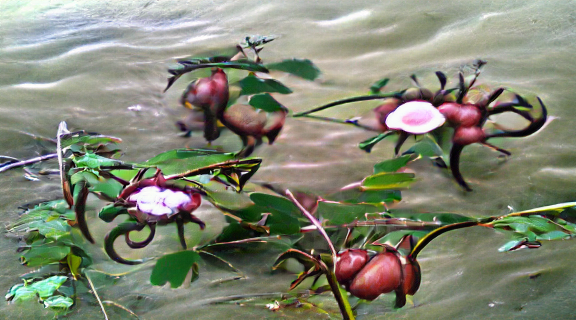
This will result in less Giger, and more Wild roses near a river
Choosing keywords wisely for your prompts can make a huge difference!
You can see this clearly from the grid posted here https://imgur.com/a/SnSIQRu
Image Prompts
You can also give the algorithm one or more image prompts. The computer will try to make images that are similar to the image prompts specified.
“image_prompts”:[“./hanhoogerbrugge.jpg”],
Copy the images that you use in the VQGAN-CLIP-Docker folder
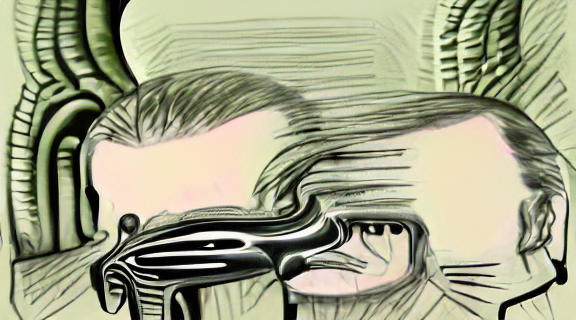
This was generated after 250 iterations using prompt: "A drawing in the style of Giger" and the following image prompt:
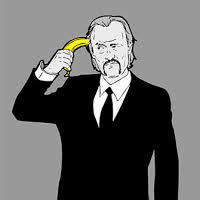
Max Iterations
Here you specify how many steps to take. More iterations will lead to more detail, and will take longer to process. 250 is usually a nice number to see if it is going in a direction you like. The more iterations the more detail, but this will also take longer to process.
A low number can be nice if you also specify an init_image, and will function like style transfer.
“max_iterations”: 250,
Save frequency
This determines after how many steps the output image will be updated. So if you want to update your generated image after 50 steps put: “save_freq”: 50,
Size
Here you specify the resolution of the image you are generating. Currently on our computers this can be a maximum of 576 x 320. If you specify higher numbers the scripts will crash due to out of memory errors. “size”: [576, 320],
Init Image
You can specify an image to start from. This will give you some control of where things will be placed.
“init_image”: “./hanhoogerbrugge.jpg”,
Copy the images that you use in the VQGAN-CLIP-Docker folder
Init image with few "max_iterations" will result in sort of a style transfer
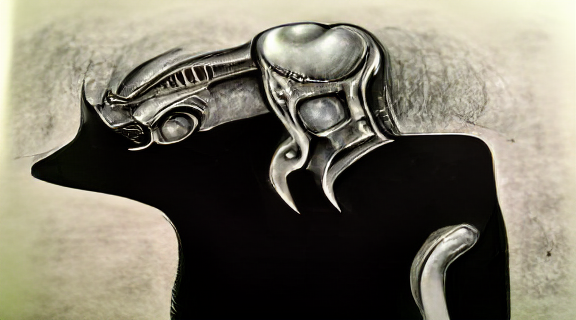
This was generated after 80 iteration with prompt "A drawing in the style of Giger", and the image below as init_image

Step 4: Save the configuration and start generating
Hit ctrl+s on the keyboard or click "save" in the top right of the window. Go to the terminal window and type the following command:
python3 -m scripts.generate -c ./configs/local.json
If all is well stuff comes =scrolling by as the program is moving along until it's done.
Step 5: Check the results
The final image will be saved in the folder named "outputs" in VQGAN-CLIP-Docker. Whatever you put in the "prompts" will be used to name the fil! In the folder "steps" you can find the image per iteration. In case you did a lot of steps, plz delete these!
Bonus Step: Upscaling the Image
The website https://bigjpg.com/ allows you to upload your image and use machine learning to enlarge you image 4 x the original size for free.
Note to make life easier
if you are playing around and running the script again and again you don't have to type the command everytime. By hitting the Up Arrow on the keyboard you can scroll through the terminal history and thus select your earlier command.
Original Config file
You can find the original config file at https://github.com/kcosta42/VQGAN-CLIP-Docker/blob/main/configs/local.json