Difference between revisions of "Motion recognition for the Arduino"
| (34 intermediate revisions by 2 users not shown) | |||
| Line 19: | Line 19: | ||
* Micro-USB to USB cable | * Micro-USB to USB cable | ||
| − | == | + | == Before starting == |
| + | It is highly recommended to start reading the following wiki articles before starting: | ||
| + | |||
| + | * [[Getting Started With Arduino]] | ||
| + | |||
| + | == Data collection == | ||
=== Creating a project in Edge Impulse === | === Creating a project in Edge Impulse === | ||
After creating an account and logging in on Edge Impulse, click on your user profile in the top right corner followed by Create new project'. This will open a new window where you can give a name to your project. After naming your project, click on the green <span style="color:rgb(0,150,0);">[Create new Project]</span> button to create your project. Edge Impulse will ask you what kind of sensor data you would like to collect. Since we're going to use the accelerometer on our mobile phone, click on 'Accelerometer data', followed by the green <span style="color:rgb(0,150,0);">[Let's get started!]</span> button. | After creating an account and logging in on Edge Impulse, click on your user profile in the top right corner followed by Create new project'. This will open a new window where you can give a name to your project. After naming your project, click on the green <span style="color:rgb(0,150,0);">[Create new Project]</span> button to create your project. Edge Impulse will ask you what kind of sensor data you would like to collect. Since we're going to use the accelerometer on our mobile phone, click on 'Accelerometer data', followed by the green <span style="color:rgb(0,150,0);">[Let's get started!]</span> button. | ||
| Line 54: | Line 59: | ||
</gallery> | </gallery> | ||
| − | == | + | == Training an ML program == |
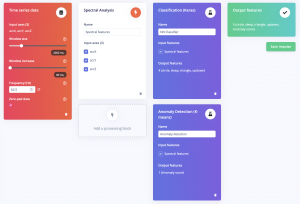
[[File:edge-impulse-design.png|thumb|The final impulse design]] | [[File:edge-impulse-design.png|thumb|The final impulse design]] | ||
Now we've got our data split in to a train and test set, we're ready to design our impulse. "Impulse Design" is how Edge Impulse names the process of choosing different "blocks" to design your ML program (the flow of your data). The first block is a '''input block''', the second block a '''processing block''' followed by the '''learning block'''. We use different blocks for each use case. When training an image recognition ML program, the input block is different when you are training a motion recognition ML program – because we're working with a different data type. Let's design the impulse for a motion recognition program! | Now we've got our data split in to a train and test set, we're ready to design our impulse. "Impulse Design" is how Edge Impulse names the process of choosing different "blocks" to design your ML program (the flow of your data). The first block is a '''input block''', the second block a '''processing block''' followed by the '''learning block'''. We use different blocks for each use case. When training an image recognition ML program, the input block is different when you are training a motion recognition ML program – because we're working with a different data type. Let's design the impulse for a motion recognition program! | ||
<br/> | <br/> | ||
<br/> | <br/> | ||
| − | Click on [Impulse design] in the left menu bar, this will take you to the impulse design page. On the page you can see the three '''input, processing''' and '''learning blocks'''. To select the first block (input), click on the rectangular shape with the dashed outline where it says 'Add an input block'. This will open a pop up window where you can select a block. For the input block we pick the '''time series data''' by clicking on <span style="color: rgb(0, 0, 150)">[Add]</span>. Repeat this process for the other two blocks, while picking '''Spectral Analysis''' for the processing block and picking the '''two''' '''Classification (Keras)''' and '''Anomaly Detection (K-means)''' blocks for the learning block. | + | Click on [Impulse design] in the left menu bar, this will take you to the impulse design page. On the page you can see the three '''input, processing''' and '''learning blocks'''. To select the first block (input), click on the rectangular shape with the dashed outline where it says 'Add an input block'. This will open a pop up window where you can select a block. For the input block we pick the '''time series data''' by clicking on <span style="color: rgb(0, 0, 150)">[Add]</span>. Repeat this process for the other two blocks, while picking '''Spectral Analysis''' for the processing block and picking the '''two''' '''Classification (Keras)''' and '''Anomaly Detection (K-means)''' blocks for the learning block. The settings for every block that Edge Impulse provides for you should suffice. After choosing your blocks |
| − | + | === What do these blocks do? === | |
| + | ==== Input block: Time series data ==== | ||
| + | Slices sensor data into smaller segments. | ||
| + | ==== Processing block: Spectral Analysis ==== | ||
| + | Processes collected data into 'features' which is what the Neural Network (learning block) expects as an input. A feature is an numerical value representing a characteristic or phenomenon in given data and is usually part of a sequence of features. | ||
| + | ==== Learning block: Classification (Keras) and Anomaly Detection (K-means) ==== | ||
| + | The learning block holds the actual ML program or in this case the classification a neural network. This is a model that learns from our data and is able to classify (sort, categorize) new data into our specified labels. The anomaly detection block is an algorithm that is able to detect if new data is something that is has seen before or not. | ||
| − | + | === Generating features === | |
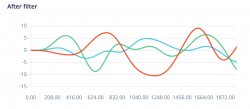
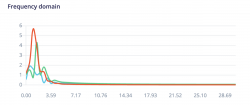
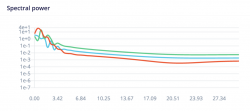
| − | + | To generate features of all the data we've collected, click on <span style="color: rgb(0, 150, 0)">[Spectral features]</span> in the left menu bar. Note: this menu item will only appear if you designed the same impulse shown in the previous section. Once on the page, you can see the features of your data. There are three stages in the processing block. The first stage smooths out the captured motion data using a low pass filter (default). The second stage finds the peaks (frequency domain) that appear in the captured data, and the last stage (spectral power) shows how much power we've put in the signal. | |
| − | + | <br/><br/> | |
| − | + | <i>You can play around with the values, but for now we will use the default values that Edge Impulse provides for us. After training your model you can always return to this screen, change some parameters and re-train your ML program.</i> | |
| − | + | <br/><br/> | |
| − | + | Scroll back to the top of the page, and click on the tab <span style="color: rgb(0, 0, 150)">[Generate features]</span>, followed by the green <span style="color: rgb(0, 150, 0)">[Generate Features]</span>. This will plot all your data in a three-dimensional graph, where you can see if all the different gestures you've collected are already separable within their given labels. This is called <strong>clustering</strong>. | |
| − | + | ||
| + | <gallery widths="250px"> | ||
| + | File:Edge-filter.png|Filter | ||
| + | File:Edge-frequency.png|Frequency domain | ||
| + | File:Edge-spectral.png|Spectral power | ||
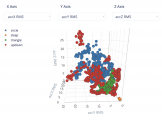
| + | File:Edge-cluster.png|Cluster, here we can see that the 'updown', 'triangle' and 'circle' are a bit all over the place, which will mean that the ML program in the next step will have some difficulties classifying every motion in the right category (label). At this moment you can decide to go back and change your collected data, or continue and see what will happen after training. We will continue! | ||
| + | </gallery> | ||
| + | |||
| + | === Training our ML program === | ||
| + | In the previous step we've generated features of our data we will now use as an input for the actual ML program (the neural network). This means we can finally start training the ML program on our collected motion data! Click on the [NN Classifier] button in the left menu bar, followed by <span style="color: rgb(0, 150, 0)">[Start training]</span> to train your ML program. You also have the possibility to shape the structure of your neural network on this page, but Edge Impulse provides us with a default structure based on the data we collected before. You can always come back after training, reshape the neural network and re-train your ML program. | ||
| + | <br/><br/> | ||
| + | The training can take up to a few minutes or longer, depending on the amount of motion data you've collected. The more data, the longer it takes to train the ML program. When your program is done training you'll see <span style="color: rgb(0, 150, 0)">[Job Completed]</span> in the output of the 'Training Output' window on the right of the page. Now it's time to run the anomaly detection algorithm. We're almost done! | ||
| + | |||
| + | <gallery widths="250px"> | ||
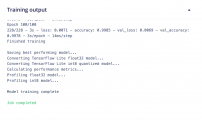
| + | File:Edge-complete.png|Output window showing training is complete | ||
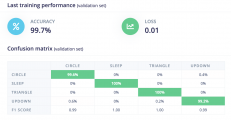
| + | File:Edge-validation.png|The neural network training performance. This table shows if the ML program was able to classify our data in to the correct labels (categories) | ||
| + | </gallery> | ||
| + | |||
| + | === Anomaly detection === | ||
| + | We use an anomaly detection algorithm in our ML program to detect new data that differs significantly from our other data. This way we now that if we perform a gesture the ML program hasn't seen before, the gesture would be classified as an anomaly. If an anomaly is detected, we know we can ignore the gesture. To run the anomaly detection algorithm on our data, click [Anomaly detection] in the left menu bar within Edge Impulse. Select the three axes (x,y,z), scroll to the bottom and click on <span style="color: rgb(0, 150, 0)">[Start training]</span>. Keep an eye out on the 'Training output' window to the right. When it outputs <span style="color: rgb(0, 150, 0)">Job completed</span>, the anomaly detection algorithm has been successfully trained. | ||
| + | |||
| + | === Generating Arduino Code === | ||
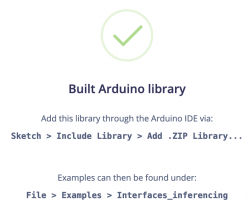
| + | [[File:Edge-completed.png|thumb|Successfully trained a ML program for the Arduino!|250px]] | ||
| + | Now it's finally time to test out our trained ML program! The great thing about Edge Impulse, is that it generates Arduino code of your ML program for you. This way we can focus more on the data that we want the ML program to classify instead of writing code. To download your ML program (library) for the Arduino, click on [Deployment] in the left menu bar (all the way to the bottom). On this page you can either download the Arduino library by selecting 'Arduino Library' and clicking <span style="color: rgb(0, 150, 0)">[Build]</span> or you can test out your ML program by running it on your phone. To do this, scroll to the bottom, select 'Phone', click <span style="color: rgb(0, 150, 0)">[Build]</span> and scan the QR code. Your ML program will now run on your phone! Perform the gestures you've trained and check if the program is able to classify them correctly. | ||
| + | |||
| + | == What's next? == | ||
| + | You've successfully trained your own motion recognition ML program for the Arduino, congrats! But what's next? There are many interesting things you can do, ranging from controlling motors, turning on lights, to controlling shapes on a screen when a certain gesture is detected by the Arduino. Coming up soon is a tutorial on how to connect your trained ML program on the Arduino to the browser using P5.js (Processing for the web). Stay tuned! | ||
| + | |||
| + | [[Category:Arduino]] | ||
| + | |||
| + | [[Category:Classification Models]] | ||
Latest revision as of 13:44, 28 November 2022
Intro
Edge Impulse is an free online service where you can build machine learning models to recognize certain patterns using sensor data. Think of audio, images and in case of this tutorial, motion (accelerometer). Machine learning (ML) is a way of writing computer programs. Specifically, it's a way of writing programs that process raw data and turn it into information that is useful for a specific purpose. Unlike normal computer programs, the rules of ML programs are not determined by a human programmer. Instead, ML uses specialized algorithms (sequence of instructions) to learn from data in a process known as training.
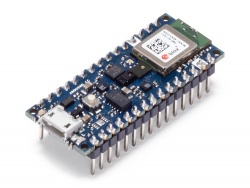
In this tutorial we will be using Edge Impulse to train a ML program to recognize gestures that you will define using the accelerometer in your mobile phone. After successfully training the ML program on your gestures, we can then generate code for the Arduino Nano 33 BLE Sense. This will allow you to perform your trained gestures with the Arduino while, at the same time, the ML program on the Arduino tries to detect what gesture is performed.
Getting Started
To train a ML program on your gestures you'll need:
- Computer with access to the internet (Firefox or Google Chrome)
- Mobile phone with an accelerometer sensor and an app to scan a QR code
- An account on Edge Impulse
To get your trained ML program on the Arduino you'll need:
- An Arduino Nano 33 BLE Sense
- Micro-USB to USB cable
Before starting
It is highly recommended to start reading the following wiki articles before starting:
Data collection
Creating a project in Edge Impulse
After creating an account and logging in on Edge Impulse, click on your user profile in the top right corner followed by Create new project'. This will open a new window where you can give a name to your project. After naming your project, click on the green [Create new Project] button to create your project. Edge Impulse will ask you what kind of sensor data you would like to collect. Since we're going to use the accelerometer on our mobile phone, click on 'Accelerometer data', followed by the green [Let's get started!] button.
Connecting your mobile phone
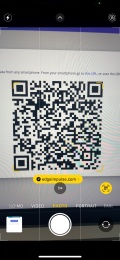
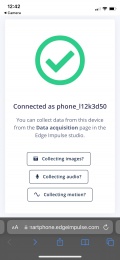
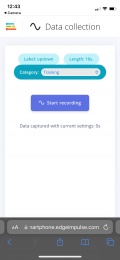
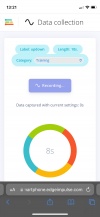
We will be using our mobile phones to collect accelerometer (gesture) data. That means we need a way to record data and send it over to Edge Impulse. To connect your phone within Edge Impulse, click on the tab 'Devices'. While on the new page click on the 'Connect new device' button in the top right corner, followed by 'Show QR code'. Now is the time to grab your mobile phone and use your camera or a QR code scanner app (e.g. Google Lens) and scan the QR shown on the screen. When done successfully you should see a green ✅ check mark ✅. After seeing the check mark, click on [Collecting motion?] to collect accelerometer data. Now we have to label the gesture we are going to collect. I'll start with a basic up and down gesture so my label will be 'updown'. For the length it's recommended to pick 10 seconds because we will record the up and down gesture in a continuous motion (you don't want to do this for minutes, trust me). As for the category we will pick 'Training'. When all these options are set, we're ready to collect data!
Collecting data
To start collecting accelerometer data (the up down gesture), click on the blue [Start recording] button. Immediately after clicking the button start performing your gesture for 10 seconds (or the amount of time you've set in the options). After the 10 seconds are up you should see the recorded gesture in the 'Data acquisition' tab within Edge Impulse. If this is not the case, try to connect your mobile phone again using the steps before.
Now your data is successfully being picked up by Edge Impulse, it is time to record more variations of the up down gesture. It is recommended to record about 5 minutes of accelerometer data for a single gesture. It is best to ask different people to record this gesture for you, as everyone performs this gesture slightly different. This means your ML program will perform better after training.
When the you've collected about 5 minutes of data for a specific gesture, try to think other gestures and record these as well (don't forget to label them accordingly!). Edge Impulse allows you to record 4 hours of data, so you can add many gestures to your ML program.
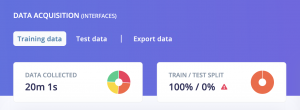
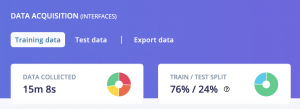
Training & test data
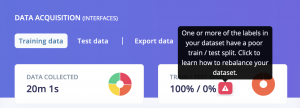
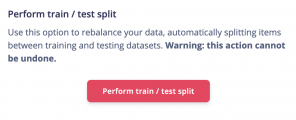
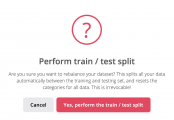
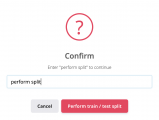
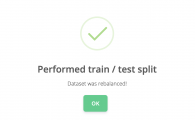
So far we've collected about 5 minutes of training data for each gesture we want the ML program to learn. To train a good performing ML program, we also need some test data. Test data is data that the ML program will never see. We will use test data to verify if the ML program is also able to detect gestures it hasn't seen in the training process. To automatically divide all your training data into train and test, click the ⚠️ exclamation mark icon ⚠️. A pop-up window will open and suggests you to divide your data into a 80/20 ratio. Click on the [Perform train / test split] button, the [Yes, perform train / test split] button and finally type "perform split", followed by pressing the [perform train / test split] button.
Training an ML program
Now we've got our data split in to a train and test set, we're ready to design our impulse. "Impulse Design" is how Edge Impulse names the process of choosing different "blocks" to design your ML program (the flow of your data). The first block is a input block, the second block a processing block followed by the learning block. We use different blocks for each use case. When training an image recognition ML program, the input block is different when you are training a motion recognition ML program – because we're working with a different data type. Let's design the impulse for a motion recognition program!
Click on [Impulse design] in the left menu bar, this will take you to the impulse design page. On the page you can see the three input, processing and learning blocks. To select the first block (input), click on the rectangular shape with the dashed outline where it says 'Add an input block'. This will open a pop up window where you can select a block. For the input block we pick the time series data by clicking on [Add]. Repeat this process for the other two blocks, while picking Spectral Analysis for the processing block and picking the two Classification (Keras) and Anomaly Detection (K-means) blocks for the learning block. The settings for every block that Edge Impulse provides for you should suffice. After choosing your blocks
What do these blocks do?
Input block: Time series data
Slices sensor data into smaller segments.
Processing block: Spectral Analysis
Processes collected data into 'features' which is what the Neural Network (learning block) expects as an input. A feature is an numerical value representing a characteristic or phenomenon in given data and is usually part of a sequence of features.
Learning block: Classification (Keras) and Anomaly Detection (K-means)
The learning block holds the actual ML program or in this case the classification a neural network. This is a model that learns from our data and is able to classify (sort, categorize) new data into our specified labels. The anomaly detection block is an algorithm that is able to detect if new data is something that is has seen before or not.
Generating features
To generate features of all the data we've collected, click on [Spectral features] in the left menu bar. Note: this menu item will only appear if you designed the same impulse shown in the previous section. Once on the page, you can see the features of your data. There are three stages in the processing block. The first stage smooths out the captured motion data using a low pass filter (default). The second stage finds the peaks (frequency domain) that appear in the captured data, and the last stage (spectral power) shows how much power we've put in the signal.
You can play around with the values, but for now we will use the default values that Edge Impulse provides for us. After training your model you can always return to this screen, change some parameters and re-train your ML program.
Scroll back to the top of the page, and click on the tab [Generate features], followed by the green [Generate Features]. This will plot all your data in a three-dimensional graph, where you can see if all the different gestures you've collected are already separable within their given labels. This is called clustering.
Cluster, here we can see that the 'updown', 'triangle' and 'circle' are a bit all over the place, which will mean that the ML program in the next step will have some difficulties classifying every motion in the right category (label). At this moment you can decide to go back and change your collected data, or continue and see what will happen after training. We will continue!
Training our ML program
In the previous step we've generated features of our data we will now use as an input for the actual ML program (the neural network). This means we can finally start training the ML program on our collected motion data! Click on the [NN Classifier] button in the left menu bar, followed by [Start training] to train your ML program. You also have the possibility to shape the structure of your neural network on this page, but Edge Impulse provides us with a default structure based on the data we collected before. You can always come back after training, reshape the neural network and re-train your ML program.
The training can take up to a few minutes or longer, depending on the amount of motion data you've collected. The more data, the longer it takes to train the ML program. When your program is done training you'll see [Job Completed] in the output of the 'Training Output' window on the right of the page. Now it's time to run the anomaly detection algorithm. We're almost done!
Anomaly detection
We use an anomaly detection algorithm in our ML program to detect new data that differs significantly from our other data. This way we now that if we perform a gesture the ML program hasn't seen before, the gesture would be classified as an anomaly. If an anomaly is detected, we know we can ignore the gesture. To run the anomaly detection algorithm on our data, click [Anomaly detection] in the left menu bar within Edge Impulse. Select the three axes (x,y,z), scroll to the bottom and click on [Start training]. Keep an eye out on the 'Training output' window to the right. When it outputs Job completed, the anomaly detection algorithm has been successfully trained.
Generating Arduino Code
Now it's finally time to test out our trained ML program! The great thing about Edge Impulse, is that it generates Arduino code of your ML program for you. This way we can focus more on the data that we want the ML program to classify instead of writing code. To download your ML program (library) for the Arduino, click on [Deployment] in the left menu bar (all the way to the bottom). On this page you can either download the Arduino library by selecting 'Arduino Library' and clicking [Build] or you can test out your ML program by running it on your phone. To do this, scroll to the bottom, select 'Phone', click [Build] and scan the QR code. Your ML program will now run on your phone! Perform the gestures you've trained and check if the program is able to classify them correctly.
What's next?
You've successfully trained your own motion recognition ML program for the Arduino, congrats! But what's next? There are many interesting things you can do, ranging from controlling motors, turning on lights, to controlling shapes on a screen when a certain gesture is detected by the Arduino. Coming up soon is a tutorial on how to connect your trained ML program on the Arduino to the browser using P5.js (Processing for the web). Stay tuned!
