Difference between revisions of "VideoCompression"
| Line 30: | Line 30: | ||
4.1 You may want to change the name of the output file (the new file you create) and the location where it will be stored. <br> | 4.1 You may want to change the name of the output file (the new file you create) and the location where it will be stored. <br> | ||
4.2 Select OK to start exporting.<br> | 4.2 Select OK to start exporting.<br> | ||
| + | |||
| + | [[Category:Video]] | ||
Latest revision as of 12:53, 21 November 2022
Learn how to compress a large video on a WdKA mac using Quicktime pro 7
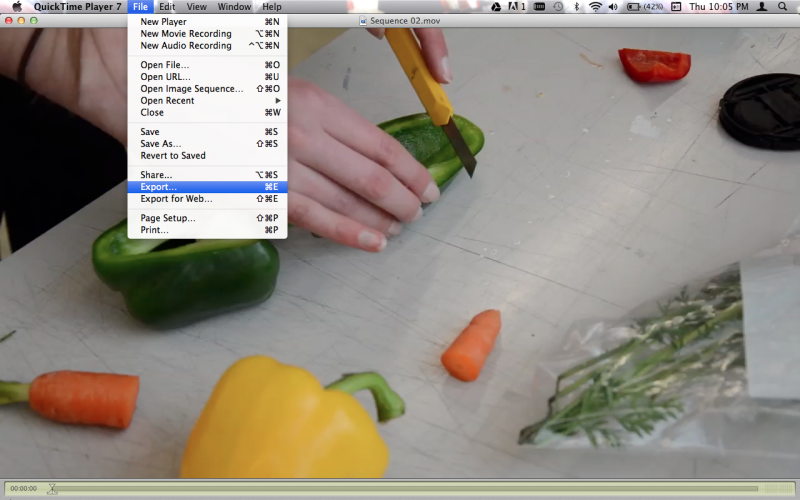
1. From the File menu choose "Export"
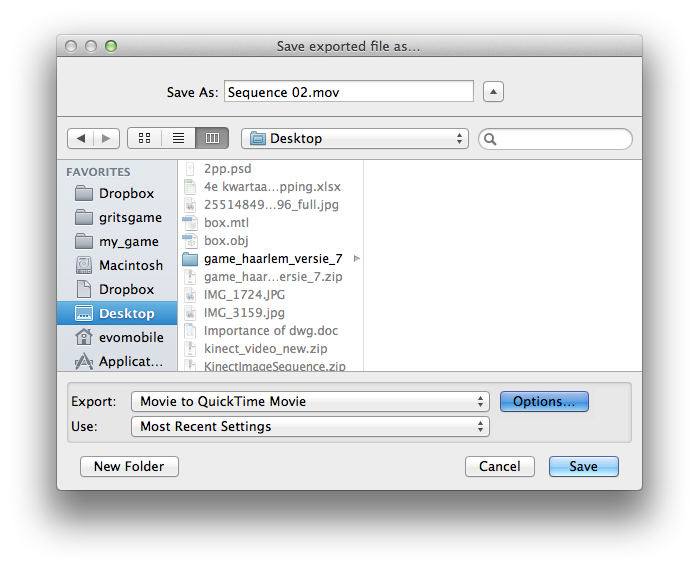
2. In the Export window select "Movie to Quicktime Movie" and select "Options"
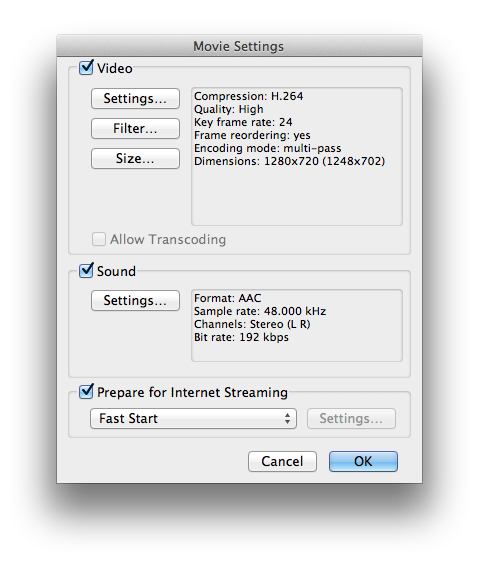
3. In the Movie Settings Window make the following changes:
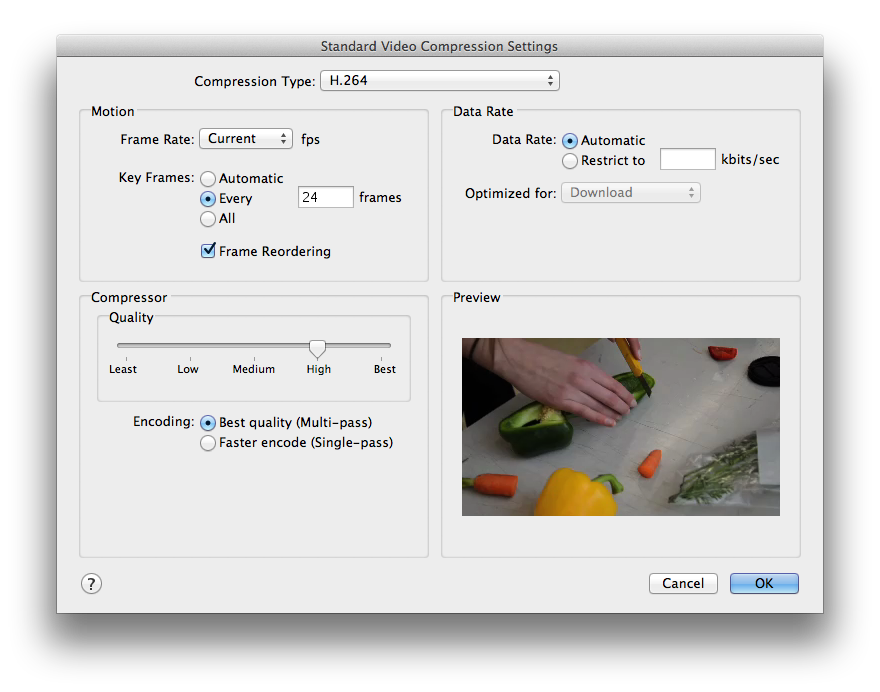
3.1 Go the Settings for Video and select H.264 as the Compression Type.
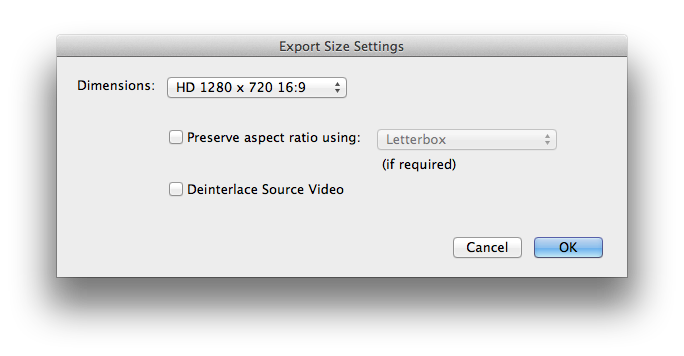
3.2 You may also want to change the size of the video.
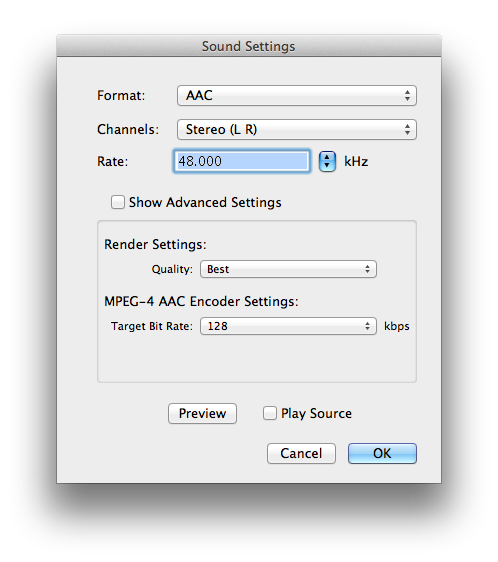
3.3 In the Settings for Audio make sure to select the AAC format, and set the Target Bit Rate to 128 kbps.
3.4 If you plan to put you video on a website make sure to check the box "Prepare for Internet Streaming" and select "Fast Start". This way the video will start playing even when the the user hasn't downloaded the entire video yet
4. Click OK to confirm the settings and go back to the Export Window.
4.1 You may want to change the name of the output file (the new file you create) and the location where it will be stored.
4.2 Select OK to start exporting.
