Difference between revisions of "About Oculus Quest"
| Line 39: | Line 39: | ||
6. Set Oculus Quest in Developer Mode, connect it to your Computer and build Android App.<br> | 6. Set Oculus Quest in Developer Mode, connect it to your Computer and build Android App.<br> | ||
| − | + | Check out the step by step tutorial here: | |
| − | + | http://interactionstation.wdka.hro.nl/wiki/Set_up_VR_in_Unity | |
| − | |||
| − | |||
| − | |||
| − | |||
| − | |||
| − | |||
===Oculus Quest and Unreal=== | ===Oculus Quest and Unreal=== | ||
Revision as of 10:16, 26 January 2022
A VR headset that works without an extra computer.It track's the physical space through six cameras inside the headset. Comes with two handheld controllers.
How to transfer files (e.g. movies) to the Quest
- 1. On Windows, the Quest will appear as a device. On Mac, install Android File Transfer to access the Quest
- 2. If the Quest does not appear, or Android File Transfer is not able to access it, deactivate Developer Mode:
- With Oculus Connect App on iPhone/Android, login with Interaction Station Account (ask at the Station)
- Select the right Oculus Device
- More Settings -> Developer mode -> disable
- 3. To run custom build apps/games, re-enable developer mode on the device!
Oculus Quest and Unity
You can easily get started making your own project for the Quest.
Option I: Oculus integration plugin (this is for Oculus devices only)
1. Make sure to use the latest stable version of Unity, downloaded at https://unity3d.com/
2. Download and import the Oculus Integration plugin from the Unity Asset Store.
3. Set your build preferences to Android, in Player-Settings enable VR support and add Oculus
4. Drag and drop the OVRPlayerControler prefab from the Prefabs folder into your scene.
5. Build your world!
6. Set Oculus Quest in Developer Mode, connect it to your Computer and build Android App.
Option II: XR interaction toolkit.
1. Make sure to use the latest stable version of Unity, downloaded at https://unity3d.com/
2. Download and import the XR interaction toolkit plugin from the Package Manager Store.
3. Set your build preferences to Android, in Player-Settings enable VR support and add Oculus
4. Create an XR Rig by creating a new asset in your hierarchy XR/ XR rig.
5. Build your world!
6. Set Oculus Quest in Developer Mode, connect it to your Computer and build Android App.
Check out the step by step tutorial here: http://interactionstation.wdka.hro.nl/wiki/Set_up_VR_in_Unity
Oculus Quest and Unreal
Oculus Quest and Link Cable
The Oculus Link cable enables PC powered VR on the Quest.
1. Make sure to connect it to a usb3 port on the pc. (on the school pc's the lower ones in the back of the pc work).
2. The other end of the cable goes in the quest
3. Wear the Quest, and in the settings enable link.
4. Start apps from the Oculus PC app, or via the Oculus Home in the Quest.
5. Any files you create will end up in your Documents folder.
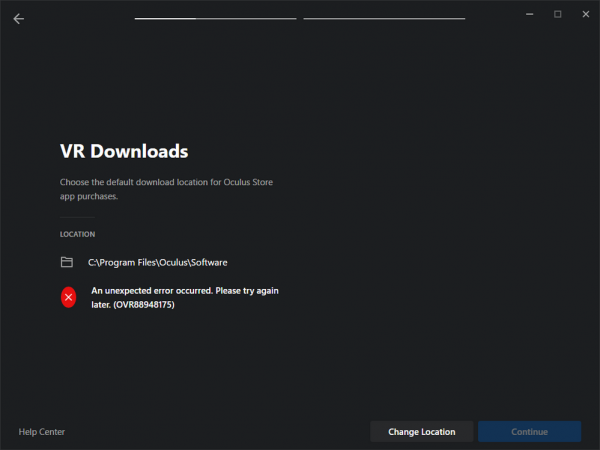
Fix to Enable Oculus Software on Student Accounts
If you get an error that looks like this when opening the Oculus software:

Download this file from here:
Registry Fix
Double click to install. You should be able to relaunch the Oculus software now!
