TouchDesigner & Arduino
You can use Arduino to send (sensor) data to TouchDesigner and vice versa.
For example, you might want to measure the light condition of a room and use this data to trigger something in TouchDesigner. Or you might want to be able to have a light bulb react to a sound file, or a motor spin in sync with a projection.
To do so there are typically to methods that can be used:
- Firmata
- Serial Communication
With this method you are making Arduino & TD talk to each other by using Serial, a communication protocol that is able to send info essentially through a wire (the usb wire that connect the board to the computer running TD). TD has a Serial DAT operator that is able to receive this data.
This method is preferred when your Arduino needs to use library or specific code to gather data from the sensors you are using.
Using Serial Communication
Serial communication is a method for transferring data between devices. It is able to send data sequentially over a wire. In this case the USB cable that connects your Arduino with the computer running TD.
For this example we are getting sensor data from a LDR and a Ultrasonic sensor, sensing light values and distance.
Arduino to TouchDesigner
Arduino wiring and code
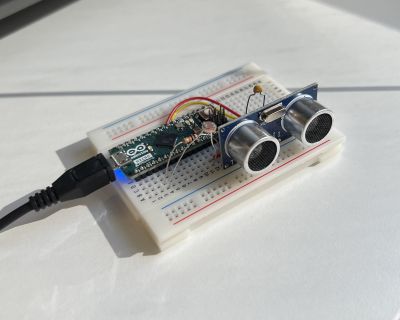
First we wire the sensors to Arduino and upload the code to the board. The following example uses a LDR (light sensor) and an Ultrasonic sensor (distance sensor).
Here is the code:
//LDR PIN and VARIABLE
int sensorPin = A0; // select the input pin for LDR
int sensorValue = 0; // variable to store the value coming from the sensor
//ULTRASONIC SENSOR PIN and VARIABLEs
const int trigPin = 2;
const int echoPin = 3;
long duration;
int distance;

void setup() {
  //start serial communication
  Serial.begin(9600); //sets serial port for communication

 //define ultrasonic sensor pin as in or out
  pinMode(trigPin, OUTPUT); // Sets the trigPin as an Output
  pinMode(echoPin, INPUT); // Sets the echoPin as an Input
}

void loop() {
  //getting sensor data from LDR
      sensorValue = analogRead(sensorPin); // read the value from the sensor

  //getting sensor data from ultrasonic sensor
      // Clears the trigPin
      digitalWrite(trigPin, LOW);
      delayMicroseconds(2);
      // Sets the trigPin on HIGH state for 10 micro seconds
      digitalWrite(trigPin, HIGH);
      delayMicroseconds(10);
      digitalWrite(trigPin, LOW);
      // Reads the echoPin, returns the sound wave travel time in microseconds
      duration = pulseIn(echoPin, HIGH);
      // Calculating the distance
      distance = duration * 0.034 / 2;

   // Prints and sends the LDR and distance sensor values on the serial monitor on two separate lines
      Serial.print(sensorValue);
      Serial.print(" ");
      Serial.println(distance);
}
By opening the serial monitor you can check the data coming from the sensors. The LDR one is going to appear as a number going from 0 to 1023 while the ultrasonic sensor value is expressed in cm.
Once we checked that everything works smooth we are going to close the serial monitor window.
Ultrasonic sensors can be a bit unstable, here is a quick fix.
Getting the data in TouchDesigner
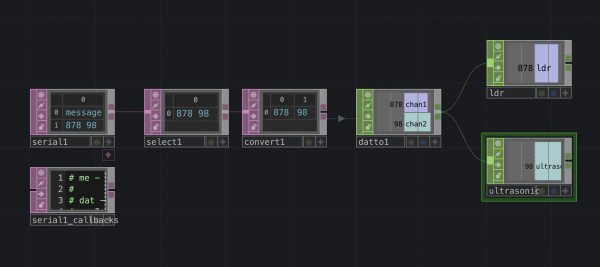
1. Open the Serial DAT
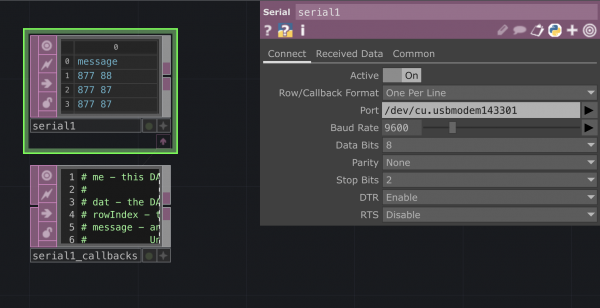
- In the panel you should set it on Active and select the callback format. Select the port where you have your Arduino connected. You should now see the numbers that you were previously seeing on the Arduino serial monitor appearing in the Serial DAT.
2. Select DAT
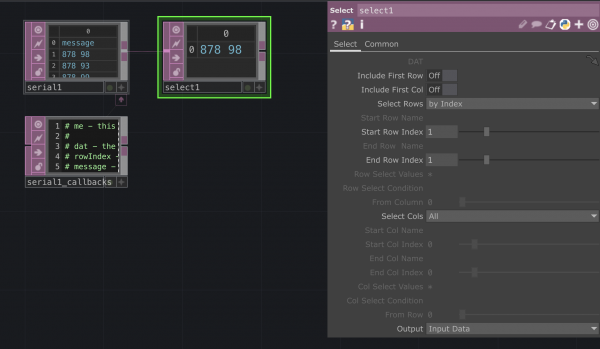
- When getting the data in we are seeing that the Serial DAT is printing a line saying "message". We are going to get rid of it with the Select DAT.
3. Convert DAT
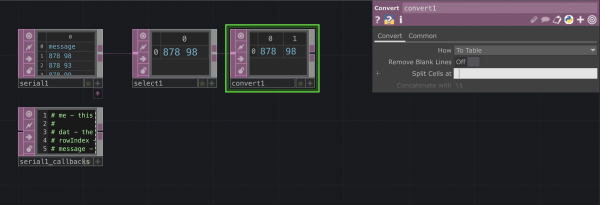
- We are now using a Convert DAT to be able to split our row into two columns so that we can eventually target each value separately.
To do so we using the Split Cells option: instead of using the default \t we are going to do it at each space.
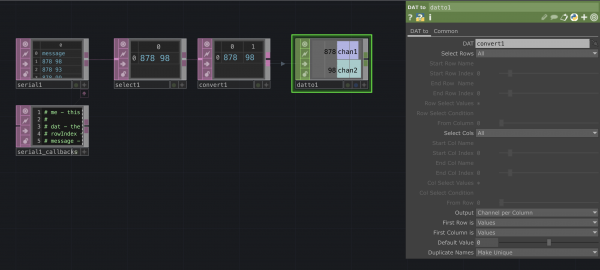
4. DAT to CHOP
- We need now to convert our DAT into a CHOP. We can use the DAT to operator in the CHOPs menu. Inside the panel we have to set:
- Output: Channel per column
- Fist Row: Values
- First Column:Values
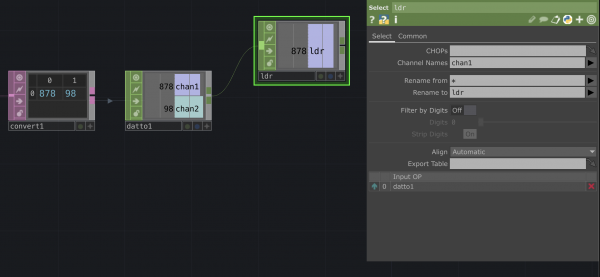
- Once you assigned each value to a channel to can use a Select CHOP to split them into two different operators. You can also rename the channel.
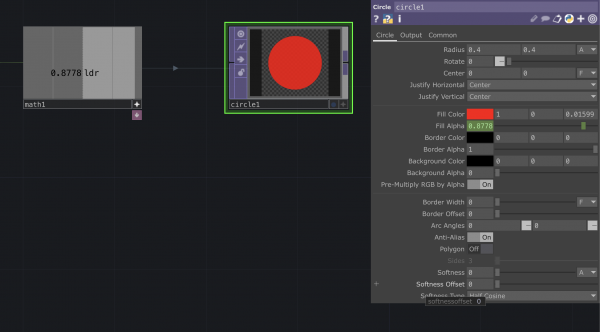
- Because we are receiving the sensor data in ranges that might not be suitable with what we want to trigger in TD we can use a Math CHOP to adjust the values to the desired range. In this case I want to remap the values coming from the sensor from 0-1023 to 0-1.
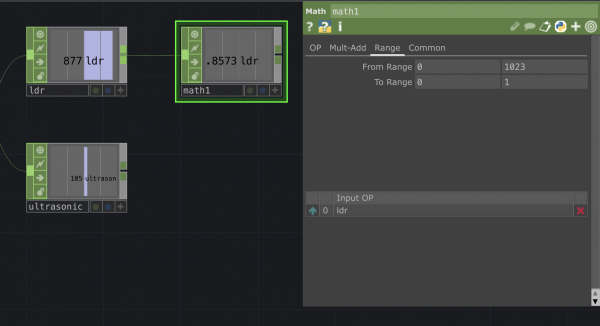
7.Use the sensor data for your needs
- You can now use the remapped value to trigger the op value that you want. In this case I am using the light sensor data to affect the alpha level of a Const TOP.
