Research/Research2014-2015-Beam
This page lists research and explorations done for the Interaction Station by Beam in the year 2014-2015.
You can also visit his blog for even more details and roundabouts:
blog
INTRO
This page is a collection of research and explorations of a "research teacher interaction station WdKA". Some topics are more practical than others, all topics are developed directly from questions of students. The goal is to document in a brief way the problems and solutions. This page is NOT meant to be technical only!!! You will see a lot of design and technolgy intertwined.
Research: Design and Energy Harvesting
The research question: "What means energy harvesting for students of the WdKA?"
Some subquestion:
- "Motivation: Why is energy harvesting an interesting topic for WdKA students?"[1]
- "Inventarisation: What kind of design projects are using energy harvesting?"
- "Which domains of energy harvesting are in most interesting for WdKA students?"
- "How can a WdKA student make a difference?"[2]
- "Practical problems for the WdKA students"
What is Energy harvesting?
Energy harvesting or scavenging is the process of acquiring small quantities of energy which are considered waste or not important or are discarded by big energy spenders.
You can make your design independent of an energy source, using this "free" energy. Besides that your design doesn't use batteries, which are considered polluting for the environment. Also your design will function where there is no electricity, nor batteries available, like remote villages or during disasters when powerlines are destroyed. There are two levels of independency: independent of supplies of power, and independecy of political manipulation or even commercial exploitation.
Why "Design" and energy harvesting?
Energy harvesting uses electronics. Depending on your chosen source of energy and the functional aspects of your design you need specific equipment. There will be an impact on your design and functioning. You have to consider why and when it will be used for what and match this with your energy harvesting strategy. This will also influence inside and outside, and the way your product will be used, in short "the design".
So it is important to look at projects of designers using this kind of energy for their products, architecture, fashion silhouets.
Tons of info on how to make your design having it's own way of generating energy
Artistic Results of this investigation
Research by an artist designer is different from scientific research. The topic is not only addressed with analysis, inventarisation, comparison and reflection, but also investigated with DIY strategies, smaller and bigger projects. The design field is complex, adding energy harvesting only raises this complexity. Useful WdKA experience can only be obtained by starting design experiments wihtin this domain testing and exploring the possibilities and difficulties.
Several experiements are done, from practical ones, like chosing a device for hacking to complicated ones like an energy game inserted in a silhouet. All the steps of these artistic investigations are documented in a blog:
[3], eg [4]
- Victory over the Sun
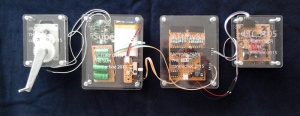
This is a wearable where you can play a game with the Sun. The Sun is generating energy with a solar cell and you are generating energy using a dynamo (the hacked Ljusa). The winner is the one who can fill the 10F supercap with energy first. The choice for a wearable is appropriate because with this wearable you can try the game at different locations and situations, thus gaining experience what kind of energy generation is best for what kind of location and circumstance.
Testing version 2 of Victory over the Sun
In a third version the electronics is made portable. You can add it to any garment you are wearing at the moment you want to play the game.
- Kit for hacking a Ljusa
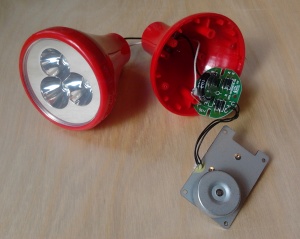
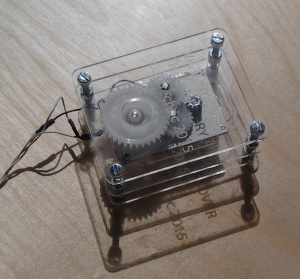
This is a tutorial how to hack a Ljusa and make it into your own energy generating product. Also the AI files for lasercutting the needed parts for nicely integrating the dynamo and the STL file for the leaver are available.
Hacking Kit for the Ljusa
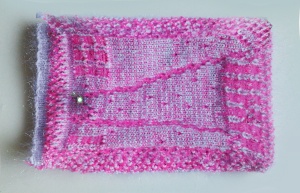
- 2015 E-textile Summercamp Swatch
For the third collection of e-textile samples called "The Swatchbook", organized by Hannah Perner-Wilson, I produced a Swatch which demonstrates flashing a LED using the tribo electric effect. The two materials, amoflex polyester and paper on aluminum foil are inserted in a knitted folding of polyester threads. Not only is this folding contributing to the effect, also the image of the energy response is visible in the knitting, using the lace knitting technique.
Light without a battery Swatch
As mentioned before the field of energy harvesting is complex. In the case of the Cambridge Mosstable designers explained some research on moss plants with a design table. But this table is suggesting possible future developments which are not at all realized at the moment. Laymen, for instance students "believe" the energy promise of this table, because there is a scientist involved. Science stands for "truth". The designer cannot be blamed suggesting too much, since he is not an expert. How far can this kind of design suggestions about technology and science go before being called a fraud?
- Research Conclusions
Exploration: Connecting the Neurosky Mindwave brain sensor to your project
Research question:
"How to connect the popular Neurosky EEG sensor to student projects?"
Subquestions:
- "Connecting to the Arduino of the Mindflex toy version, and charting/solving problems"
- "Connecting the Bluetooth Neurosky version, and charting/solving problems"
Serial Connection: with 2 wires.
Connecting the Mindflex version (marktplaats 15-25 euro's) to the Arduino is not very difficult and well described in tutorials:
How-To
scripts
The problem is keeping the connection alive. Sometimes it works using a solution of salt and wetting your forehead a little bit.
The other problem is a design problem: the mindflex on your head is looking clumsy already, the wires and or an Arduino on top look even clumsier:-)
Mobile Phone connection
For connecting the Neurosky Mindwave Mobile (more expensive: amazon, 130 euor's), using Bluetooth, the sensor brain signals can be send wirelessly to your mobile phone or an Arduino.
If you connect with your Mobile Phone this device is in the Bluetooth protocol the "Master". Everything is easy following the instructions.
If you want ot make your own app you have to know how to program Android devices. Mindwave has a DEV kit and examples.
Wireless connection to an Arduino: Bluetooth
For this you need a Bluetooth module attached to your Arduino.
When the Mindwave has to connect the bluetooth module attached should serve as a Master. Most Bluetooth modules can act without a problem as a slave, but only some as Master. Yu have to find the right BT module.
This solves the clumsyness problem: the Arduino (or standalone ATmega328) can be hidden in your project.
There are 2 relevant tutorials:
Sparkfun
Mindwave
Although in these tutorials the right Bluetooth Module is indicated we compared several Bluetooth boards:
By the way, the hacked Mindflex sends the same data as the Mindwave Mobile, but is connected directly, using wires, to an Arduino (Serial RX PIN).
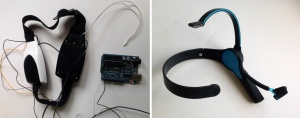 Left Mindflex, right the Mindwave, the last one looks far more designed!
Another update: if you have trouble doing the Serial acrobatics then you could switch the Arduino for a Teensy. This board can be programmed with Arduino software, costs less, and has 3 Serial Ports, beside the USBSerial. It can be connected easily to a BlueSMiRF and the Mindwave:
blogpost about this
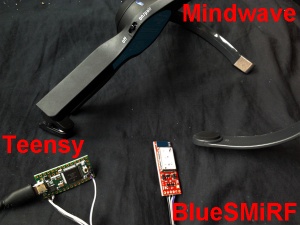
The Teensy has much more possiblities, lots of PWM PINs for Servo Motors, touch (proximity) PIN's etc.
Exploration: EPOC brain waves visualiser
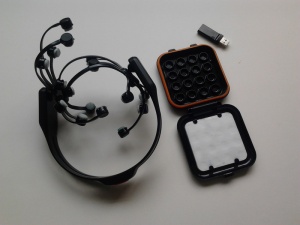 EPOC, with 14 sensors, compared to 1 of the Mindwave
At Stadslab you can work with the EPOC of emotiv.
Compared to the Mindwave this device promises a lot. The EPOC comes as a device giving signals which are already processed. The software to get the RAW data has to be bought separately and at twice the cost of the device itself. The software is not available at Stadslab.
The signals for facial expressions seem to work reasonably well, blink, laugh, smile, right focus, left focus. The so called "AFFECT" values are not looking too good at the moment (maybe more experience is needed).
These can be found in the OSC data:
/AFF/Engaged/Bored;

/AFF/Excitement;

/AFF/Excitement Long Term;

/AFF/Meditation;

/AFF/Frustration;
During a recording of values (see setup below) Meditation and Engagement were always constant. Left with excitement, "excitement long term" and frustration you see that excitement and "excitement long term" are rather related, the long term is the same flattened out, filtering out the peaks.
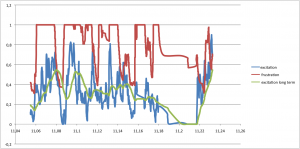
These data can be found atgithub
During wearing you can discover that, according to this device, your frustration is suddenly at 100%! Also your excitement is not really what you feel yourself. This is also displayed in the image, where frustration is often at the 1.0 maxiumum. Besides that: frustration below the 1.0 is very similar to Excitement...
It could be that these data will improve if you train the device, that is calibrate it to your kind of brainwaves.
Test setup for recording data:
The EPOC has a USB dongle connecting to a WINDOWS laptop. You use the standard Emotiv EPOC Control Panel application to connect and select the user. Then you need "Mind the OSC" application to extract OSC values. These can be read by a Processing application.
example by Hyperritual.
To save the AFFECT data we used this Processing sketch which can be found at Github.
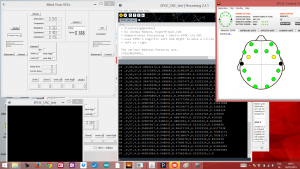 Then the data can be visualised in Excel, or Google Charts.
Compared to the Mindwave Mobile this EPOC has more possibilities but mainly for registration of facial expressions.
Exploration: Hacking the KH-940 machine knitter
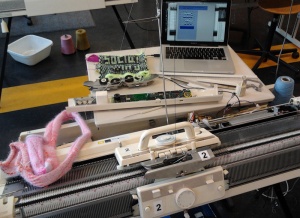
This is called lobotomy - brain transformation - of the knitting machine KH-940. The hardware in the machine is removed and replaced with an Arduino Due. This microcontroller with a special board and special software can connect to the KH-940 knitting machine. You can prepare images for knitting in several knitting techniques. Not only Nordic, but also patent stitch, slip stitch, weave stitch and other stitches.
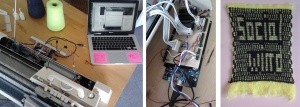
Demonstration: 28-05-2015 and 03-06-2015
Exploration: Making Relief prints using a 3D printer
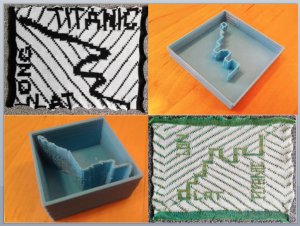
This investigation was combining the "old" analog relief print press with the "new" 3D printer. The 3D printer is used to create plates which can be printed using the relief print press in the Publication station. Possibilities of the 3D printer, like the fill patterns are used to create special effects. In the workflow the Blender plugin which can make relief from images is used.
It all started on a small river near a small town in Holland:
[6]
A draft research paper can be found here:
[7]
Course about this subject: Quarter 3 2014/2015
Course powerpoint1
Course powerpoint2
Course powerpoint3

Exploration continues on the knitting machine:
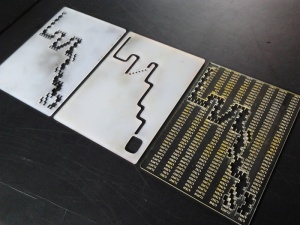
and on the lasercutter:
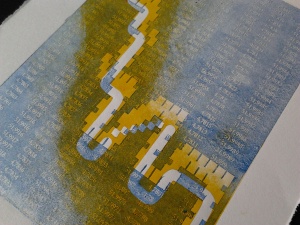

Exploration: Visualising and Materializing GPS Tracking
What can you do with a GPS tracking?
Rowing on a small river in the heart of Holland....
First of all you can project your track in Google Earth.
But what exactly is your track, where are the data?
The data file is in .kmz format. This is a zip, chane it to .zip and unzip.
Then you find the .kml file. In there are your data.
These data can be imported into Excel or Google Charts.
Then you can start designing your path like the famous subway map from London: get these undesigned curves out!
xls example with formula's
With this nice straigthened path you can make a relief in Blender using import image plugin and the modifiers subdivision and displace.
Make an STL file and export to a 3D printer, now you have your track in 3D.
Or you go to a knitting machine and knit your track, using Designa Knit and Nordic knitting.
More about More Servo motors
There are lots of motors, stepper motors, DC motors and servo motors etc to choose from. You have to find the right motor for your project. This is about the servomotor. It seems to be simple, but what do you need to consider when you want to use more than one servomotor? About:
- power considerations,
- scripting considerations,
- design considerations
- PWM,
- examples from student projects,
see this page.
Read all about this: The LIPO charger COMPLOT
The lipo battery is useful, delivering 3.8 - 4.2V, there are many kinds of lipo's around, having different power ratings (from 300 mAh to 6000 mAh).
The lipo batteries are rechargeable. You need a special charger:
Here the one from Antratek.nl:
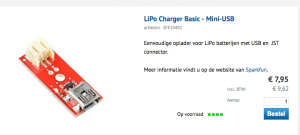
This charger costs nearly 10 euro,s with VAT.
There are about 7 components on this board and two connectors.
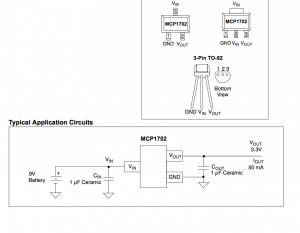
Once the lipo connector of one of my chargers was broken (because the JST connector detaches rather clumsily), and I connected the lipo the wrong way. This resulted predictably in burning the chip. I looked at the price of the main chip and this was under a euro, since the charger is about 10 euro's, I ordered the chip MCP73831, and I soldered this replacement and the charger worked again (always a nice feeling).
Later on I looked at all the required components and made a list of these, if you order them from conrad.nl:
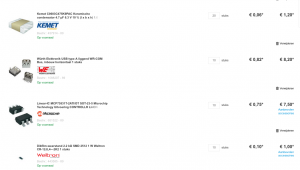
you have to add one LED and a small piece of PCB, but also the lipo JST connector - this component was not found at conrad.nl
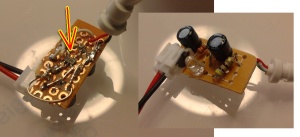
You have to do a little bit of SMD soldering, but this is not too difficult.
Here you see my test version (the first one, so terrible soldering, and only the chip is SMD):
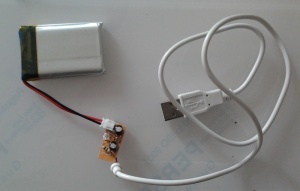
But then, you realize that this DIY board costs around 2.5 euro's.
Considering mass production the profit margin must be over 66-%75%, this is too much!
This over expensive lipo charger must be a complot against humanity!

Somebody must be getting very rich!

Revolt by soldering your own chargers, become independent!
An example of a circuit where I used the basic lipo charger:
This is a pollution sensor (MQ-6) with a microcontroller and a small TFT screen. The setup is powered by a lipo and the lipo is permenently connected to a charger (where I added a switch). Close to the switch is the USB connector for charging.
The function of the screen is to see more than just a value of pollution, you can see the change of pollution, either improvement or deterioration.
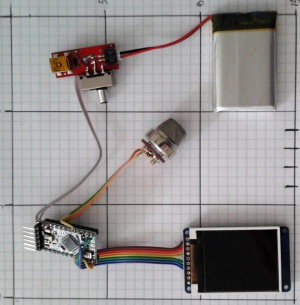
This pollution sensor and screen is used in the "Care" project of by-wire.net
