Difference between revisions of "Mindwave EEG sensor"
m (Annasa moved page Mindwave to Mindwave EEG sensor) |
|||
| (27 intermediate revisions by 2 users not shown) | |||
| Line 3: | Line 3: | ||
== Intro == | == Intro == | ||
| − | This page tells you about the "real" Mindwave Mobile 2 | + | This page tells you about using the "real" Mindwave Mobile 2. |
It can be ordered at amazon.com, or amazon.nl: https://www.amazon.nl/neuroSky-Estate-neurofeedback-headset-MindWave/dp/B07CXN8NKX/ref=sr_1_1?__mk_nl_NL=ÅMÅŽÕÑ&keywords=mindwave+mobile&qid=1588840419&sr=8-1 | It can be ordered at amazon.com, or amazon.nl: https://www.amazon.nl/neuroSky-Estate-neurofeedback-headset-MindWave/dp/B07CXN8NKX/ref=sr_1_1?__mk_nl_NL=ÅMÅŽÕÑ&keywords=mindwave+mobile&qid=1588840419&sr=8-1 | ||
| Line 11: | Line 11: | ||
[[File:Mw8.png|200px]] | [[File:Mw8.png|200px]] | ||
| − | == bluetooth connection == | + | == bluetooth connection and data connection== |
| + | |||
You need a "fresh" normal AAA battery for the head set. | You need a "fresh" normal AAA battery for the head set. | ||
I tried to connect bluetooth to my MACOS laptop, and a Android telephone, both connections started and then failed. | I tried to connect bluetooth to my MACOS laptop, and a Android telephone, both connections started and then failed. | ||
| − | But then | + | But then the bluetooth worked...on a bigger MAC. But this is only half of the story, the second stage which has to be working is the data picked up by the sensor on the headset. |
| − | + | For the proper data, the head set must be very well adjusted. | |
| − | [[File:Mw1.png|300px | + | [[File:Mw1.png|300px]] [[File:Mw2.png|300px]] |
I could finally open the "MindWave Mobile Tutorial.zip" in the folder "Mac Setup Kit". | I could finally open the "MindWave Mobile Tutorial.zip" in the folder "Mac Setup Kit". | ||
| − | This zip is | + | This zip is strange enough an app - I thought this was a zip containing documents and guides! |
| − | This app indicates if your bluetooth connection is of sufficient quality for the data. | + | This app indicates if your bluetooth connection is of sufficient quality for the data. At first it didn't work at all.... |
I did a lot of fitting and refitting of the headset, and finally got started having a connection it liked. | I did a lot of fitting and refitting of the headset, and finally got started having a connection it liked. | ||
| − | [[File:Mw9.png|300px | + | [[File:Mw9.png|300px]] [[File:Mw10.png ]] |
| + | |||
| + | This might cause problems if you use an Arduino connection...how can you then tell the connection is not what it should be? | ||
== Installing software at your laptop == | == Installing software at your laptop == | ||
| Line 35: | Line 38: | ||
I tried to install the software | I tried to install the software | ||
| − | Thinkconnector | + | Thinkconnector and Brain Visualiser |
| − | Brain Visualiser | ||
| − | on my MACOS, but ... | + | on my MACOS, but ... it is not running at the moment on a 64 bits operating system. |
Then I tried to install it on my windows 8 laptop. | Then I tried to install it on my windows 8 laptop. | ||
| − | Then ... it suddenly worked at the bigger MAC. | + | Then ... it suddenly worked at the bigger MAC - with this zip file indicated above. |
| + | |||
| + | == testing == | ||
| + | |||
| + | With the right kind of connection, and if this zip-app is happy about the connection you can test your "Attention", "Meditation", and "Blink". | ||
| + | |||
| + | [[File:Mw3.png|200px]] [[File:Mw4.png|200px]] [[File:Mw5.png|200px]] [[File:Mw6.png|200px]] | ||
| + | |||
| + | The blinking was not reacting for me. | ||
| + | |||
| + | == Connecting Bluetooth to BlueSMiRF == | ||
| + | |||
| + | Then back to the soldering device | ||
| + | |||
| + | [[File:Mw11.png|200px]] | ||
| + | |||
| + | Using the BlueSMiRF of Sparkfun, you can connect with a microcontroller: https://www.sparkfun.com/products/12577 | ||
| + | |||
| + | This code to get into the command code worked (after some time to understand and get used to the "no line" and "line break" switching in the Serial Window. | ||
| + | |||
| + | Then the configuring on this page | ||
| + | |||
| + | https://learn.sparkfun.com/tutorials/hackers-in-residence---hacking-mindwave-mobile?_ga=2.146391420.932859955.1588796476-1975814699.1588796476#configuring-the-bluetooth-module | ||
| + | |||
| + | Some problems because in the tutorial there is a space in the command: | ||
| + | |||
| + | "Type: SM, 3 + carriage return. " --- there is a space behind the 3 isn't there? Well, then it does not work....no spaces between the command letters, the comma, and the number. | ||
| + | |||
| + | ok, the BlueSMiRF shows the green LED, for automatic connection to the Head set. | ||
| + | |||
| + | [[File:Mw22.png|200px]] | ||
| + | |||
| + | The next day the green light didn't show up, the connection wasn't made, after changing the battery it did connect and showed the values. | ||
| + | |||
| + | == Connecting to an Arduino == | ||
| + | |||
| + | The code on this page: https://learn.sparkfun.com/tutorials/hackers-in-residence---hacking-mindwave-mobile?_ga=2.146391420.932859955.1588796476-1975814699.1588796476#configuring-the-bluetooth-module requires an extra TX RX to get the data inside the laptop for Processing. This can be done by another Arduino. | ||
| + | |||
| + | I wanted some device only on the Arduino showing the effect. | ||
| + | |||
| + | [[File:Mw12.png|200px]] The Arduino, also having a TFT screen for visualisation later on, if the connections are working and the data coming through. | ||
| + | |||
| + | After a day of configuring and retrying, reconnecting Bluetooth, back and forth between a MAC (for testing the connection) and the BlueSMiRF....the connection is not yet producing something reliable... | ||
| + | |||
| + | Then getting rid of code in the calculating loop, it started working. | ||
| + | |||
| + | [[File:Mw20.png|200px]] | ||
| + | |||
| + | [[File:Mw21.png|200px]] The first column is the attention, then the delta, theta, low alpha, high alpha waves. (Well if you believe it, see this page: http://interactionstation.wdka.hro.nl/wiki/EEG ) | ||
| + | |||
| + | The Arduino code can be found here: https://github.com/contrechoc/mindwavecode | ||
| + | |||
| + | |||
| + | == Visualising the brain waves == | ||
| + | |||
| + | Numbers are difficult for the brain to follow. Visualising the numbers into simple graphs can help. | ||
| + | |||
| + | See what happens if the attention and meditation values are plotted in time: | ||
| + | |||
| + | [[File:Mw23.png|200px]] | ||
| + | |||
| + | The values from 0-100 are plotted from top to bottom, for meditation - blue and attention - green line. | ||
| + | |||
| + | The green line is the attention, at first (starting at the top) the green line is rather at the high side, the blue line - meditation - is lower. Then I close my eyes and breath slowly. The blue line is really going up (to the high side) and the green line down. It seems to work, if this "effect" is not just measuring the tension in my forehead muscles? But ok, whatever. | ||
| + | |||
| + | Arduino code for visualizing can be found here: https://github.com/contrechoc/mindwavecode/blob/master/visualisingTFT | ||
| + | == Troubleshooting == | ||
| − | + | The green light on the BlueSMirF will not turn green: try a new battery. | |
| + | |||
| + | The values are all over the place: try adjusting the sensor on your forehead, using the testing app at a laptop. | ||
| + | |||
| + | I try changing the Arduino code, but it will not Flash to the Arduino: remove the TX RX cable of the BlueSMiRF from the PIN 0 and 1 of the Arduino, upload/flash and put the RX TX cable back. | ||
| + | |||
| + | I have changed the Arduino code in the loop section, putting a "delay()" command in the code, and now the data will not come out: don't put "delay()" or time consuming code inside the loop, it will disrupt the gathering of the data from the head-set. | ||
| − | + | I have bought my own head set and now the green light of the BlueSMirF will not light up: The BlueSMirF is programmed to connect automatically to the headset of the Interaction Station, it will not connect to other headsets. You have to program your own BlueSMirF, using the links mentioned above. | |
| + | [[Category: EEG Brain Sensors]][[Category: Arduino]] | ||
Latest revision as of 13:55, 13 January 2023
Intro
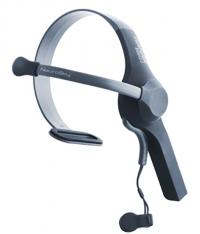
This page tells you about using the "real" Mindwave Mobile 2.
It can be ordered at amazon.com, or amazon.nl: https://www.amazon.nl/neuroSky-Estate-neurofeedback-headset-MindWave/dp/B07CXN8NKX/ref=sr_1_1?__mk_nl_NL=ÅMÅŽÕÑ&keywords=mindwave+mobile&qid=1588840419&sr=8-1 It costs at the moment 155 euro.
bluetooth connection and data connection
You need a "fresh" normal AAA battery for the head set.
I tried to connect bluetooth to my MACOS laptop, and a Android telephone, both connections started and then failed.
But then the bluetooth worked...on a bigger MAC. But this is only half of the story, the second stage which has to be working is the data picked up by the sensor on the headset.
For the proper data, the head set must be very well adjusted.
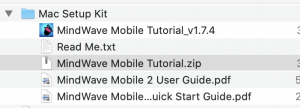
I could finally open the "MindWave Mobile Tutorial.zip" in the folder "Mac Setup Kit". This zip is strange enough an app - I thought this was a zip containing documents and guides!
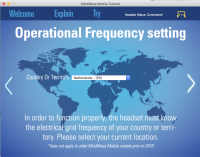
This app indicates if your bluetooth connection is of sufficient quality for the data. At first it didn't work at all....
I did a lot of fitting and refitting of the headset, and finally got started having a connection it liked.
This might cause problems if you use an Arduino connection...how can you then tell the connection is not what it should be?
Installing software at your laptop
I tried to install the software
Thinkconnector and Brain Visualiser
on my MACOS, but ... it is not running at the moment on a 64 bits operating system.
Then I tried to install it on my windows 8 laptop.
Then ... it suddenly worked at the bigger MAC - with this zip file indicated above.
testing
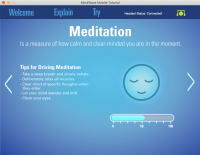
With the right kind of connection, and if this zip-app is happy about the connection you can test your "Attention", "Meditation", and "Blink".
The blinking was not reacting for me.
Connecting Bluetooth to BlueSMiRF
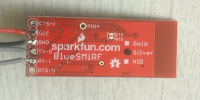
Then back to the soldering device
Using the BlueSMiRF of Sparkfun, you can connect with a microcontroller: https://www.sparkfun.com/products/12577
This code to get into the command code worked (after some time to understand and get used to the "no line" and "line break" switching in the Serial Window.
Then the configuring on this page
Some problems because in the tutorial there is a space in the command:
"Type: SM, 3 + carriage return. " --- there is a space behind the 3 isn't there? Well, then it does not work....no spaces between the command letters, the comma, and the number.
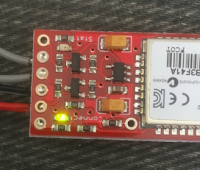
ok, the BlueSMiRF shows the green LED, for automatic connection to the Head set.
The next day the green light didn't show up, the connection wasn't made, after changing the battery it did connect and showed the values.
Connecting to an Arduino
The code on this page: https://learn.sparkfun.com/tutorials/hackers-in-residence---hacking-mindwave-mobile?_ga=2.146391420.932859955.1588796476-1975814699.1588796476#configuring-the-bluetooth-module requires an extra TX RX to get the data inside the laptop for Processing. This can be done by another Arduino.
I wanted some device only on the Arduino showing the effect.
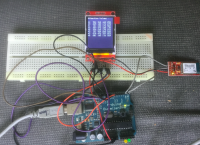
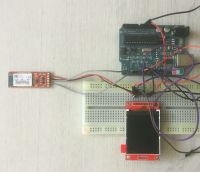 The Arduino, also having a TFT screen for visualisation later on, if the connections are working and the data coming through.
After a day of configuring and retrying, reconnecting Bluetooth, back and forth between a MAC (for testing the connection) and the BlueSMiRF....the connection is not yet producing something reliable...
Then getting rid of code in the calculating loop, it started working.
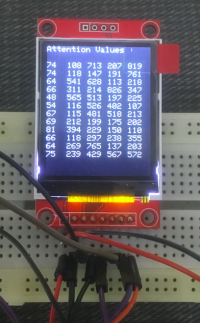 The first column is the attention, then the delta, theta, low alpha, high alpha waves. (Well if you believe it, see this page: http://interactionstation.wdka.hro.nl/wiki/EEG )
The Arduino code can be found here: https://github.com/contrechoc/mindwavecode
Visualising the brain waves
Numbers are difficult for the brain to follow. Visualising the numbers into simple graphs can help.
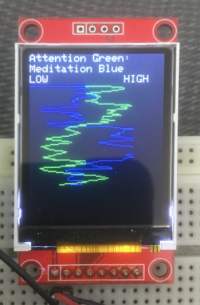
See what happens if the attention and meditation values are plotted in time:
The values from 0-100 are plotted from top to bottom, for meditation - blue and attention - green line.
The green line is the attention, at first (starting at the top) the green line is rather at the high side, the blue line - meditation - is lower. Then I close my eyes and breath slowly. The blue line is really going up (to the high side) and the green line down. It seems to work, if this "effect" is not just measuring the tension in my forehead muscles? But ok, whatever.
Arduino code for visualizing can be found here: https://github.com/contrechoc/mindwavecode/blob/master/visualisingTFT
Troubleshooting
The green light on the BlueSMirF will not turn green: try a new battery.
The values are all over the place: try adjusting the sensor on your forehead, using the testing app at a laptop.
I try changing the Arduino code, but it will not Flash to the Arduino: remove the TX RX cable of the BlueSMiRF from the PIN 0 and 1 of the Arduino, upload/flash and put the RX TX cable back.
I have changed the Arduino code in the loop section, putting a "delay()" command in the code, and now the data will not come out: don't put "delay()" or time consuming code inside the loop, it will disrupt the gathering of the data from the head-set.
I have bought my own head set and now the green light of the BlueSMirF will not light up: The BlueSMirF is programmed to connect automatically to the headset of the Interaction Station, it will not connect to other headsets. You have to program your own BlueSMirF, using the links mentioned above.
