Difference between revisions of "Integrating Sound in Your Projects"
| (One intermediate revision by the same user not shown) | |||
| Line 13: | Line 13: | ||
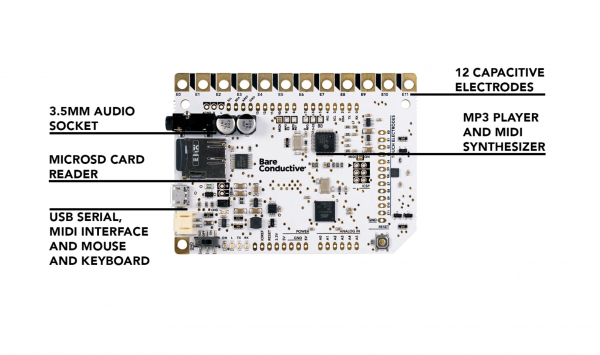
<i> BareConductive TouchBoard </i> | <i> BareConductive TouchBoard </i> | ||
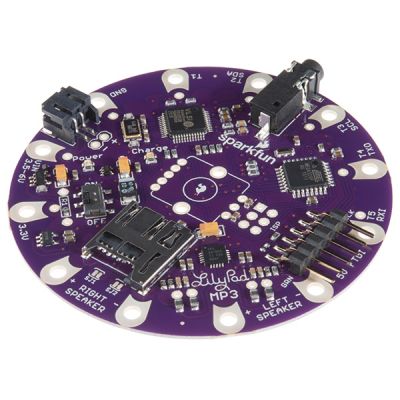
| − | - [[ | + | - [[Sparkfun Lilypad Mp3]]: The LilyPad MP3 Player is your all-in-one audio solution, containing an Arduino-compatible microcontroller, MP3 (and many other formats) audio decoder chip, micro-SD card socket, and a stereo audio amplifier. Part of the Lilypad E-textiles line, this board can be used to give your fabric creations the gift of music, or any other sounds you can put on a micro-SD card. |
[[File:Lilypad.jpg|400px]] | [[File:Lilypad.jpg|400px]] | ||
| − | <i> | + | <i> Sparkfun Lilypad MP3 </i> |
Latest revision as of 13:02, 21 June 2024
When one wants to add sound to their electronics project, there are a lot of ways to do it. At the Interaction Station, we offer a couple of simple ways to work with sound in your interactive project.
BOARDS WITH SOUND CAPABILITIES
There are some prototyping boards with sound already build in. At the Interaction Station we have the BareConductive TouchBoard and the Lilipad MP3. These boards make it quite accessible to make an interactive piece with sound.
- Touch Board: The Touch Board is a microcontroller (like Arduino for instance), with already build in capacitive sensors (also known as touch sensors) as well as an audio socket. This set up makes the board really convenient for projects having interaction through touch (or proximity) and a sound output.
- Sparkfun Lilypad Mp3: The LilyPad MP3 Player is your all-in-one audio solution, containing an Arduino-compatible microcontroller, MP3 (and many other formats) audio decoder chip, micro-SD card socket, and a stereo audio amplifier. Part of the Lilypad E-textiles line, this board can be used to give your fabric creations the gift of music, or any other sounds you can put on a micro-SD card.
Sparkfun Lilypad MP3
ARDUINO SHIELDS
Another easy way to add sound to your interactive project is with an Arduino shield. A minimum amount of wiring is needed. You just click it onto your Arduino UNO, MEGA or Leonardo, create a program using the example library. It is quite easy to play audio files with this.
- Adafruit "Music Maker" MP3 Shield: The Adafruit "Music Maker" is a very easy to use shield made by Adafruit. With it, you can play audio files or be used to create a MIDI controller. The version we have at the Interaction Station, does however, not have amplification, so you cannot directly drive speakers with it. It is specifically designed for the Arduino UNO, Leonardo and MEGA. To use this shield with pressure plates or buttons, follow this tutorial: Playing sound (with the MP3 shield) & pressure plates
Adafruit "Music Maker" MP3 Shield
BREAKOUT BOARDS
You can also use breakout boards to add to your interactive project is with an Arduino shield. You need to do some wiring for this, but its a cheaper option and allows you to make create a custom circuit for your project. There are two options for this:
- DFPlayer: The DFPlayer is a cheap and compact way to add sound to your project. It has a build in stereo amp (3W per channel) which can drive small speakers. If you use it with an Arduino Nano, you have a very compact module that can play sound which can store up to 32GB of data on a microSD card. Nice for wearables or mobile set-ups. This can be used with various Arduino's, ESP's and other microcontrollers. It also only uses 2 digital pins.
DFPlayer mini
- Adafruit VS1053 Codec + MicroSD Breakout - MP3/WAV/MIDI/OGG Play + Record - v4: This breakout board is designed to be used on a breadboard. It can play various audio files and be used to record audio. You can do all sorts of stuff with the audio as well such as adjusting bass, treble, and volume digitally. There is also 8 GPIO pins that can be used for stuff like lighting up small LEDs or reading buttons.
Adafruit VS1053 Codec + MicroSD Breakout


