Optocoupler
Optocouplers and buttons

Perhaps you want to control a television or a music player, or drive a remote control
car. Most electronic devices have a control panel with buttons, and many of those buttons can be
hacked so that you can "press" them with an Arduino.
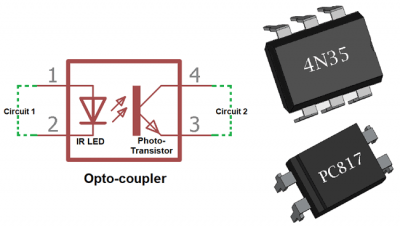
Optocouplers are integrated circuits that allow you to control one circuit from a different one without
any electrical connection between the two. Inside an optocoupler is an LED and a light detector. When
the LED in the optocoupler is turned on by your Arduino, the light detector closes a switch internally.
The switch is connected to two of the output pins of the optocoupler. When the internal
switch is closed, the two output pins are connected. When the switch is open, they're not connected.
This way, it's possible to close switches on other devices without connecting them to your Arduino.
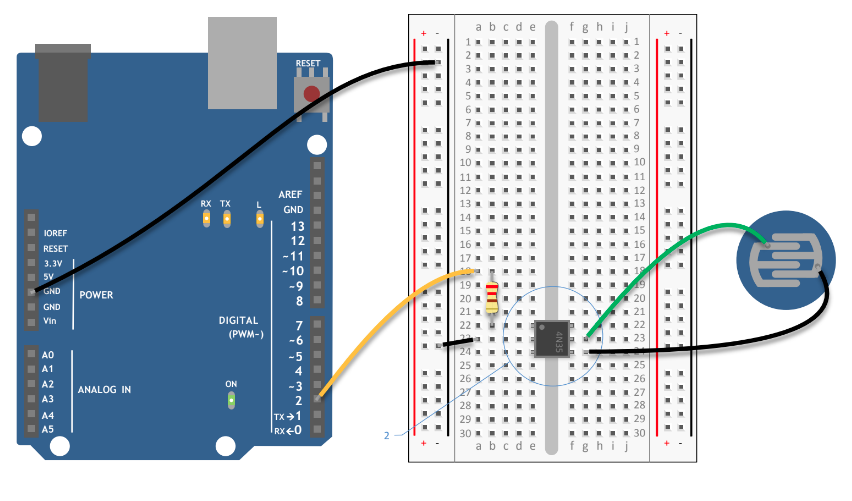
1) Connect ground to your breadboard through the Arduino.
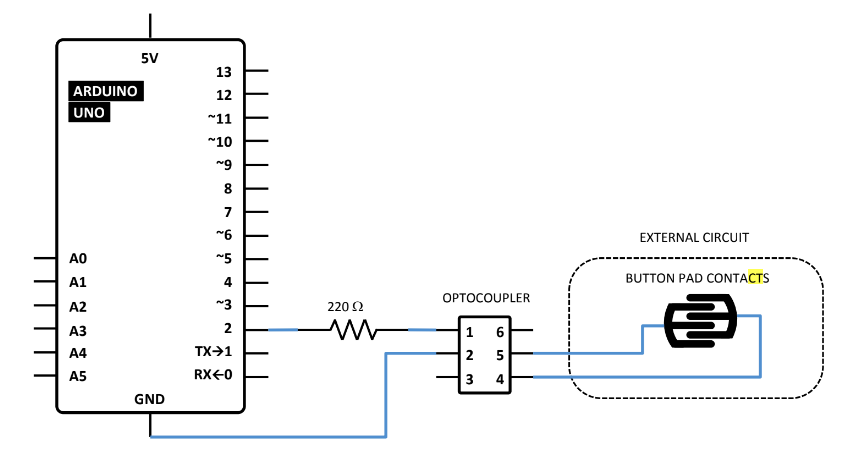
2) Place the optocoupler on the breadboard so that is straddles the center of the board (see circuit
diagram).
3) Connect pin 1 on the optocoupler to Arduino pin 2 in series with a 220-ohm resistor (remember,
you're powering an LED inside, you don't want to burn it out). Connect pin 2 of the optocoupler
to ground.
4) On the main board of the sound module there are a number of electrical components, including
a playback button.
To control the switch, you're going to have to remove the button. Flip the circuit board over and
find the tabs that hold the button in place. Gently bend the tabs back and remove the button
from the board.
5) Under the button are two small metal plates. This pattern is typical of many electronic devices
with pushbuttons. The two "forks" of this pattern are the two sides of the switch. A small metal
disc inside the pushbutton connects these two forks when you press the button.
6) When the forks are connected, the switch is closed on the circuit board. You will be closing the
switch with the optocoupler.
This method, closing a switch with an optocoupler, works only if one of the two sides of the
pushbutton's switch is connected to ground on your device. If you're not sure, take a multimeter
and measure the voltage between one of the forks and the ground on your device. You need to
do this with the device turned on, so be careful not to touch anywhere else on the board.
Once you know which fork is ground, disconnect the power to your device.
7) Next, connect one wire to each of the small metal plates. If you are soldering these wires, be
careful to not join the two sides of the switch together. If you are not soldering and using tape,
make sure your connection is secure, or the switch won't close. Make sure neither wire connects
to the other fork, or your switch will be closed all the time.
8) Attach the two wires to pins 4 and 5 of the optocoupler. Connect the side of the switch that is grounded to pin 4 of the optocoupler. Connect the other fork to pin 5 of the optocoupler.

